HardwareAccessAndMicropython

Page Actions

Setting up and IoT

Session 2: Micropython and

Hardware access

Uli Raich

Formally CERN, Geneva, Switzerland

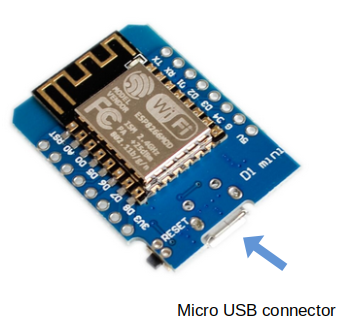
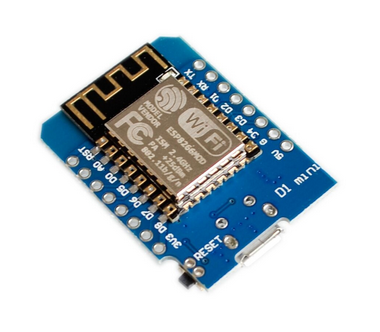
The WeMos D1 mini CPU card
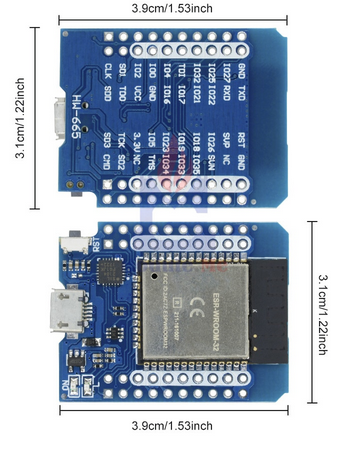
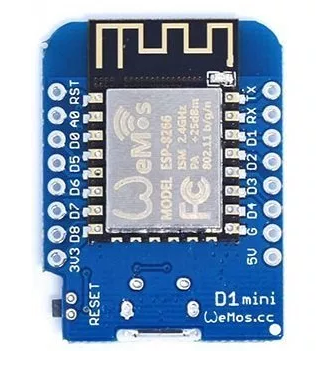
esp8266.png wemosEsp32.png

ESP8266

cost: 2.21 Euros

ESP32

cost: 4.1o Euros

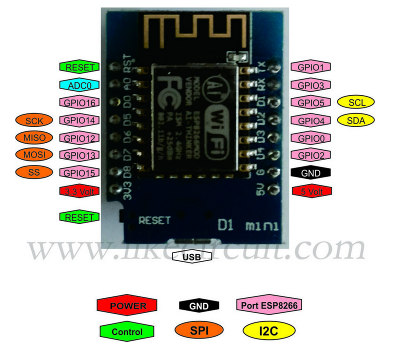
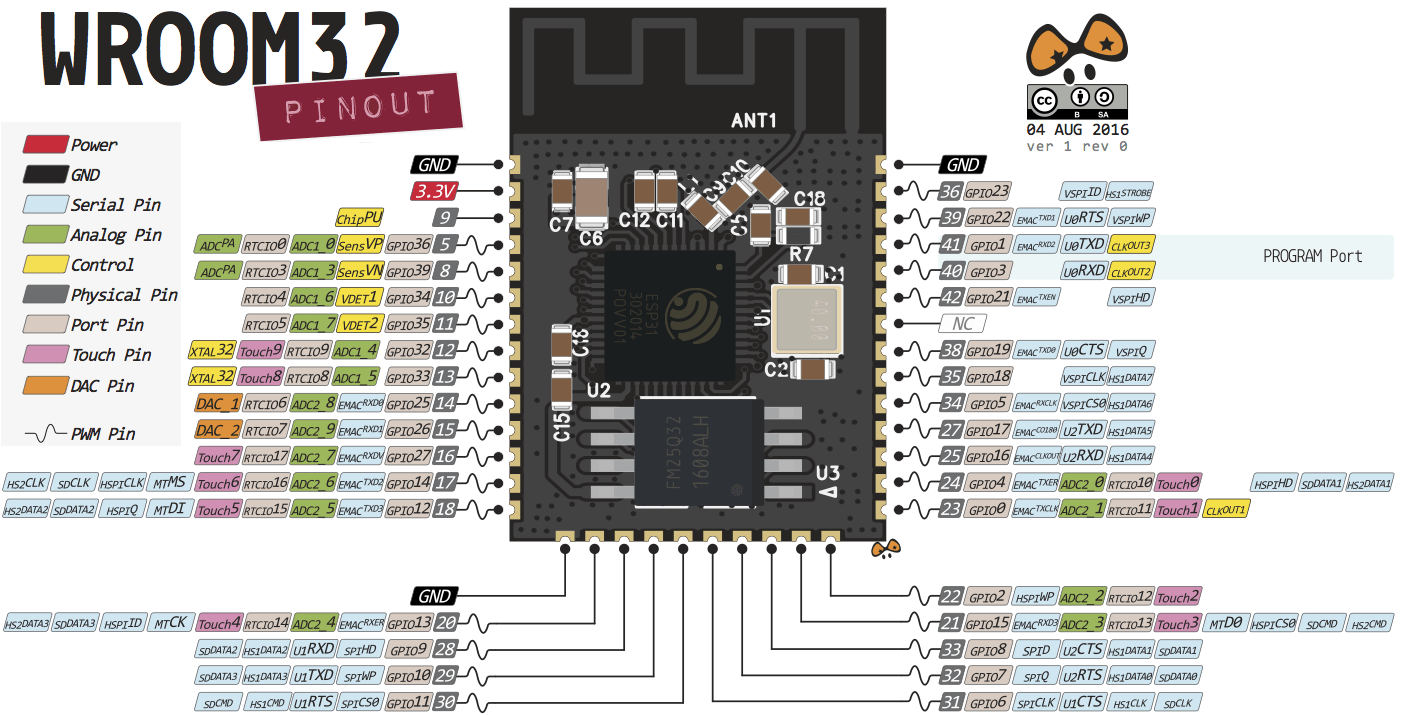
CPU Pinout

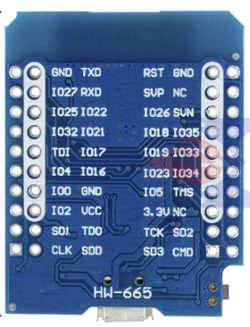
esp8266Pinout.png esp32Pinout-v2.png
ESP8266 ESP32
Please note: The pin numbers IOxx on the ESP32 correspond

to the GPIO pin numbers

The pins in the white fields go to the WeMos D1 mini bus

and are also available on the ESP8266

The other pins are only accessible on the ESP32 CPU card

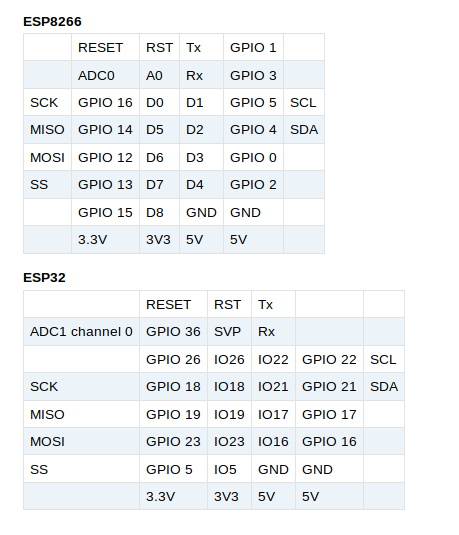
The pin numbers Dx do not correspond to GPIO pin numbers!

Please refer to the next slide for correspondence

CPU pinouts for reference

cpuPinouts.png

Meaning of pins on ESP8266

  • GPIO: General Purpose Input Output.
    Drives a single digital line which
    can be programmed input or output
  • SCL/SDA: The I2C bus:a 2 wire bus
    interfacing sensors or actuators to the CPU

  • SCL,MISO,MOSI,SS: SPI
    the Serial Peripheral Interface.
    Used fast communication with external device
esp8266PinMeaning.png

Meaning of pins on ESP32

esp32-pinout-chip-ESP-WROOM-32.png

How to program the processor

esp8266Programming.png Several development tools are available:
  • ESP_IDF: The official Espressif development tool.
    Includes a gcc compiler for the ESP8266 and the ESP32

Please see:
https://docs.espressif.com/projects/esp-idf/en/latest

  • The Arduino IDE
    Needs extensions for these processors
    and the different CPU boards

see:

https://docs.espressif.com/projects/esp-idf/en/latest

  • MicroPython

see:
https://micropython-docs-esp32.readthedocs.io/en/esp32_doc

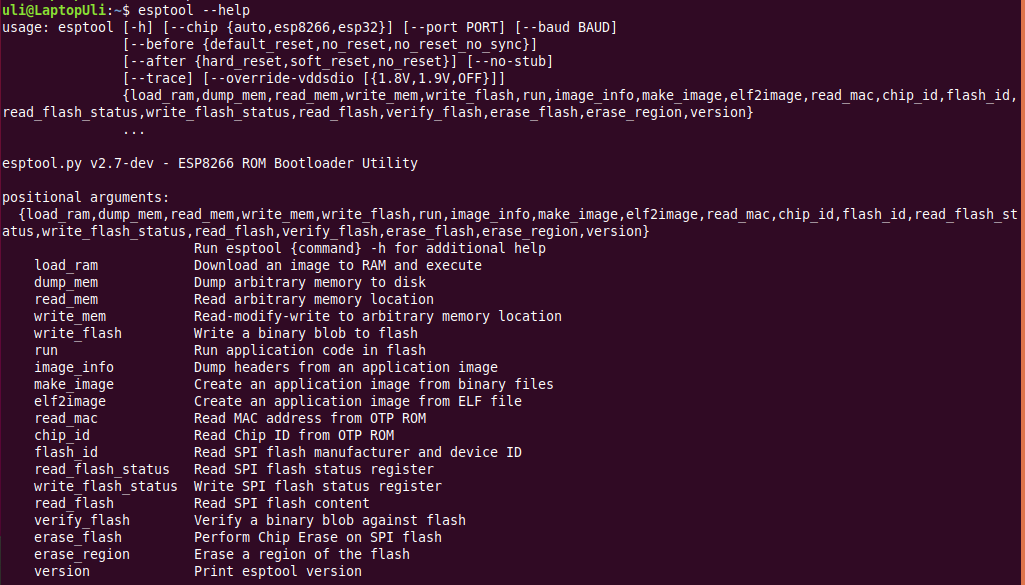
Flashing the code

esptool.png

esptool

  • esptool is called from the Makefiles in ESP-IDF
  • esptool is used when we upload code from the Arduino IDE to the processor flash
  • esptool is used with Micropython IDE on uPyCraft

    installs Micropython onto the processor flash
In the above cases the use of esptool is hidden to us.

We can however also execute esptool directly.

How to write a Micropython program?

First we need a Micropython interpreter!

You find the sources here:

https://github.com/micropython/micropython/

In the repository you find ports for the ESP8266 and the ESP32.

In order to compile the code you need the ESP-IDF and its cross compilers

The code compiles into a binary file (firmware-combined.bin) which contains a boot loader and the interpreter.

This binary must be uploaded and flashed.

For documentation of the ESP8266 port of Micropython look at

https://docs.micropython.org/en/latest/esp8266/tutorial/index.html

Slide 10 of 64

How to communicate with the Micropython interpreter?

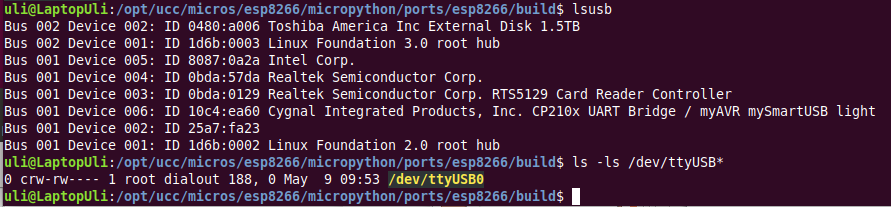
We use a serial connection passing through the micro USB connection.

As soon as we connect the processor card to the PC we see the

UART bridge and a new device: dev/ttyUSB0 is created.

This device is used to communicate with the Micropython REPL.
lsusb.png

You see the command prompt and you can interact with Micropython. But \x85 how to upload scripts?

Slide 11 of 64

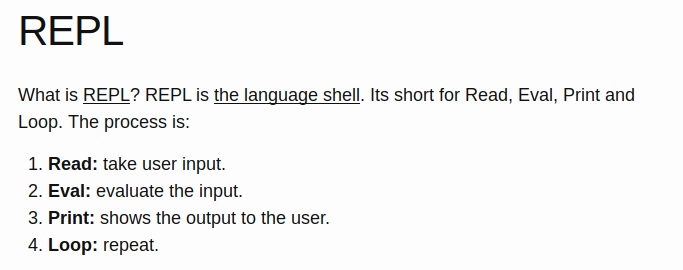
What is REPL?

repl.png

Slide 12 of 64

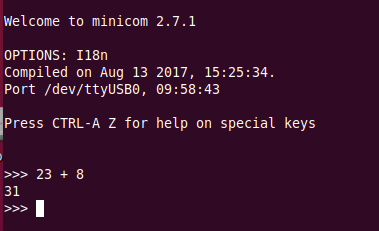
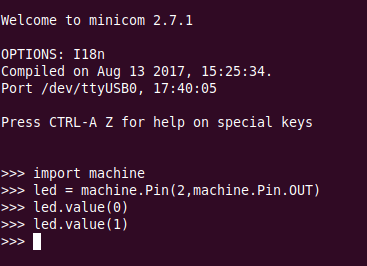
The communication tools: minicom

minicom.png

You see the command prompt and you can interact with Micropython.

But \x85 how to upload scripts?

Slide 13 of 64

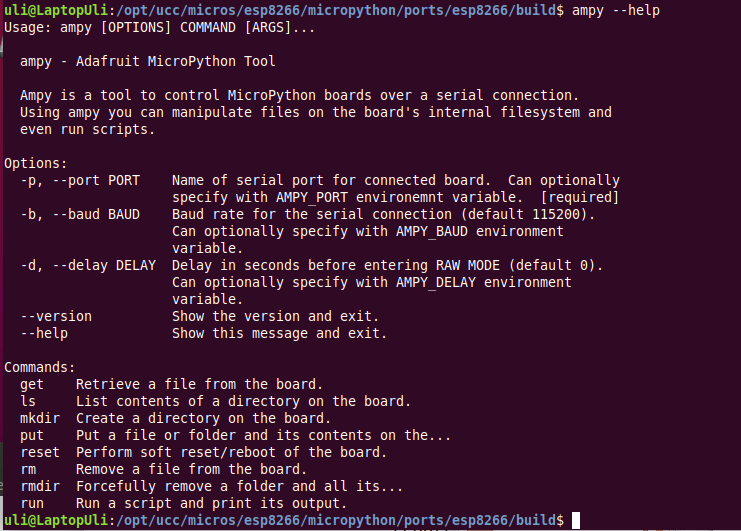
The command line tool ampy

ampy.png

Slide 14 of 64

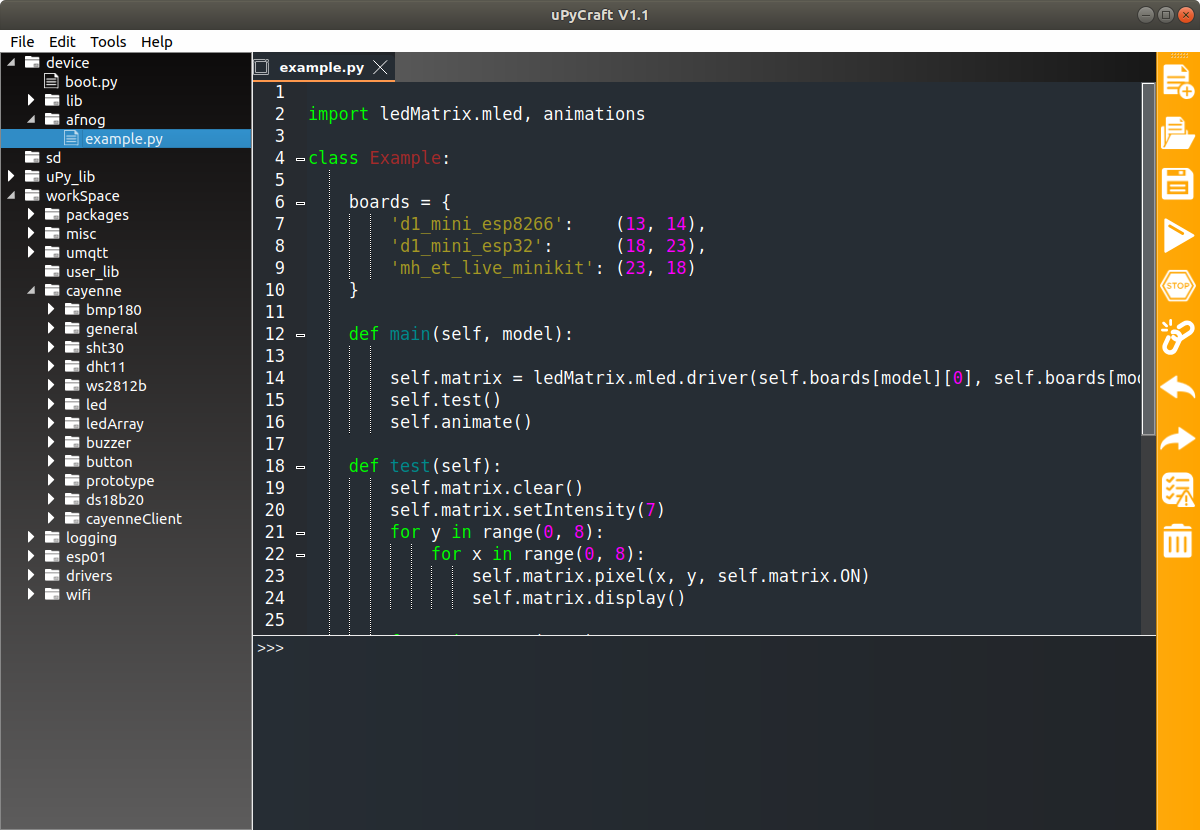
IDE for Micropython: uPyCraft

uPyCraft.png

Slide 15 of 64

uPyCraft

uPyCraft is a rather complete Integrate Development Environment (IDE)

which lets you

  • Access the REPL

  • Create directories on the Micropython file system

  • Upload scripts

  • Syntax check scripts

  • Run scripts

  • Install Micropython on your processor board

Slide 16 of 64

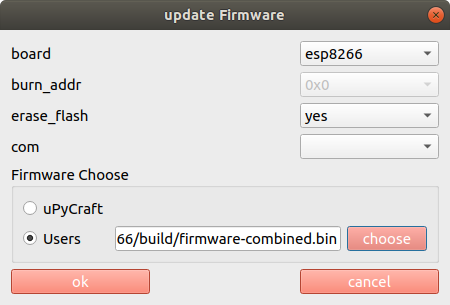
Flashing Micropython

This has already been done for you! However, it is easy if you want to do it

at home with a new processor board.

Compiling a new version of Micropython is substantially harder but also perfectly possible.
updateFirmware.png

Slide 17 of 64

uPyCraft(2)

uPyCraft is based on QT4 and is available for Linux, Windows and Mac.

It is written in PyQt4 the Python language binding to Qt4.

The Linux version did not work for me when running Ubuntu 18.04 or later.

I found a version based on PyQt5 (new version of QT) which was even worse.

I tried to correct as much as I could to make the PyQt5 version usable on Linux:

https://github.com/uraich/uPyCraft-Qt5

Slide 18 of 64

Thonny

thonny.png

Slide 19 of 64

Thonny (2)

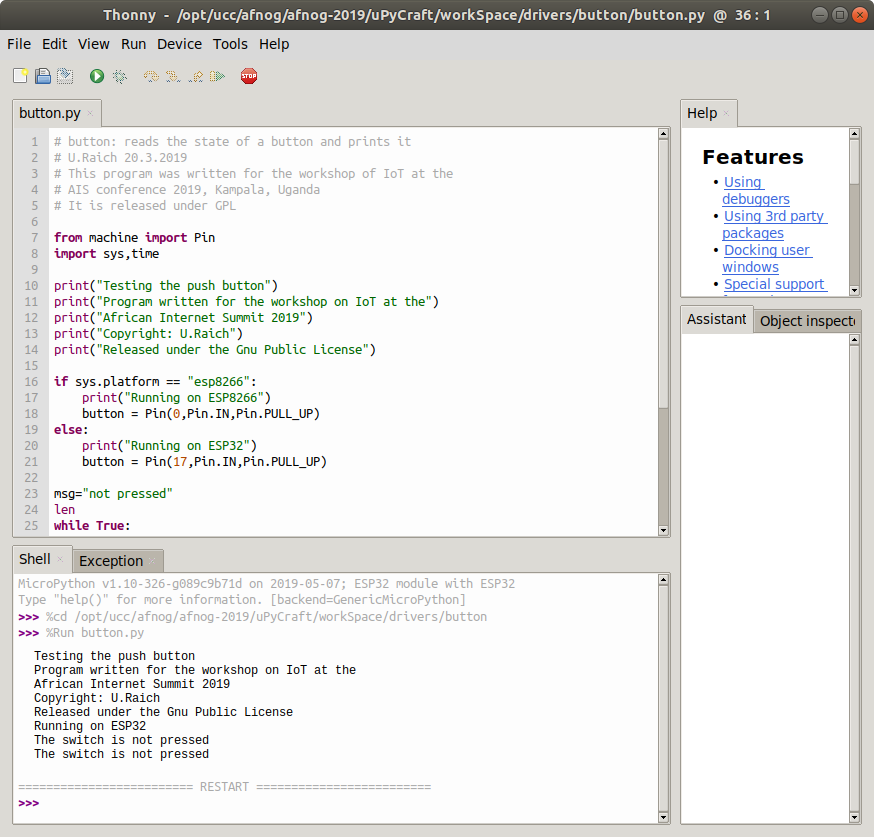
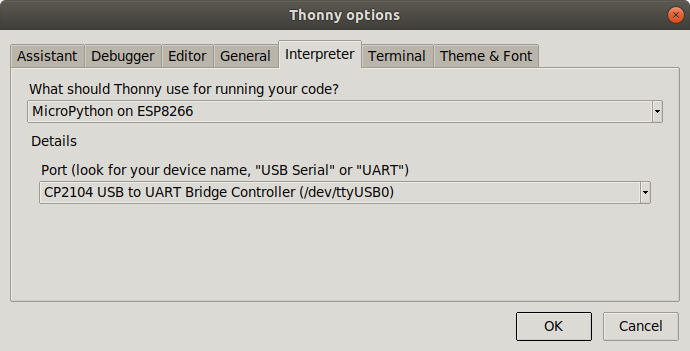
Thonny is an IDE for Python which has provisions for Micropython.

Under Tools → Options button you can select the type of

Python interpreter you intend to use.
thonny_uP.png

Slide 20 of 64

IoT Hello World program

A \x93Hello World\x94 program, just printing \x93Hello World\x94 on the screen

does not look very exciting.

However, this is generally used to verify that the infrastructure

Compiler, linker, downloader, flash program

are working correctly

In embedded systems printing can be quite complex

and a blinking LED is used instead.

Slide 21 of 64

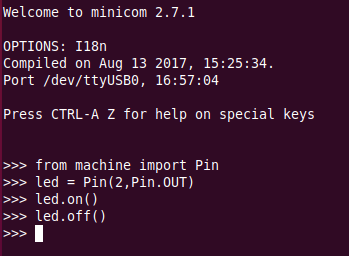
Switching on and off a LED

The ESP8266 and the ESP32 have a \x93user LED\x94 connected to GPIO 2.

How do we control this LED?

  • Define that the LED is connected to GPIO 2

  • Program this pin as output

  • Write a logic 1 to the pin to switch it on

  • Write a logic 0 to the pin to switch it off

  • The logic state may be inverted if the LED is active low

Slide 22 of 64

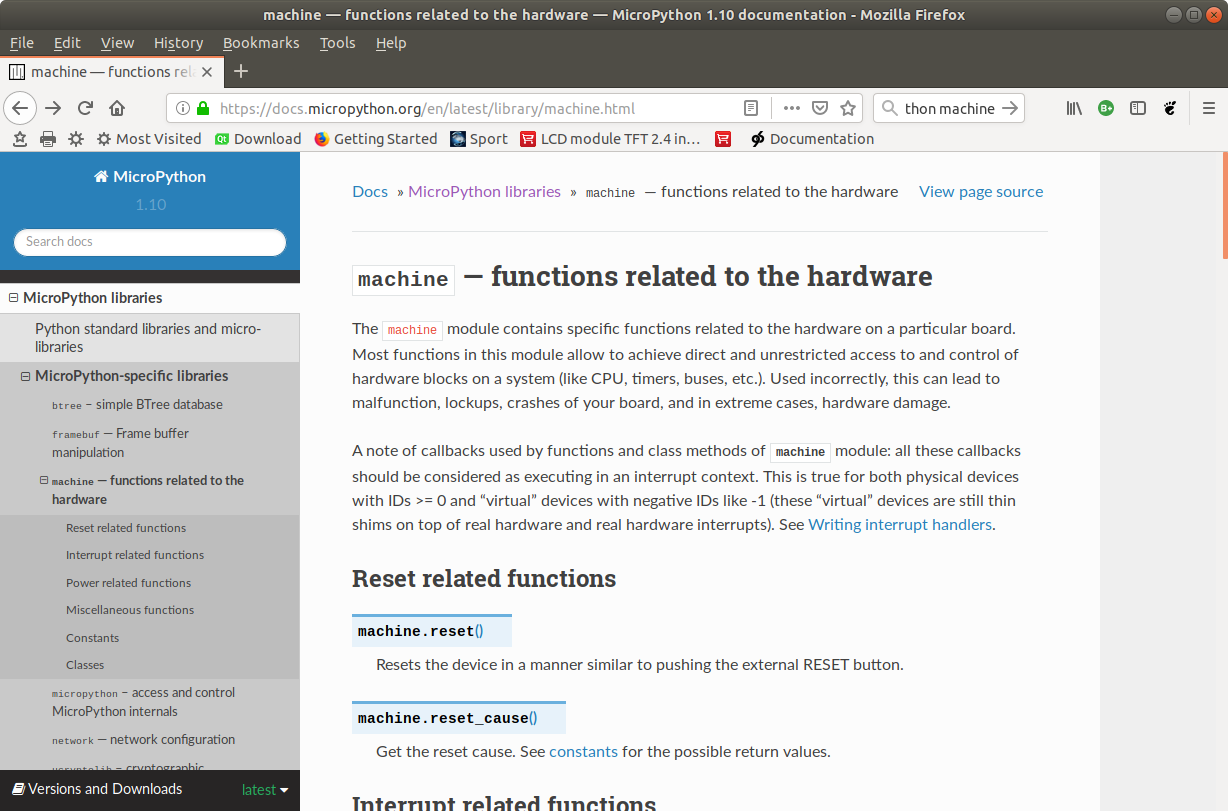
Micropython hardware functions

hardwareFunctions.png

Slide 23 of 64

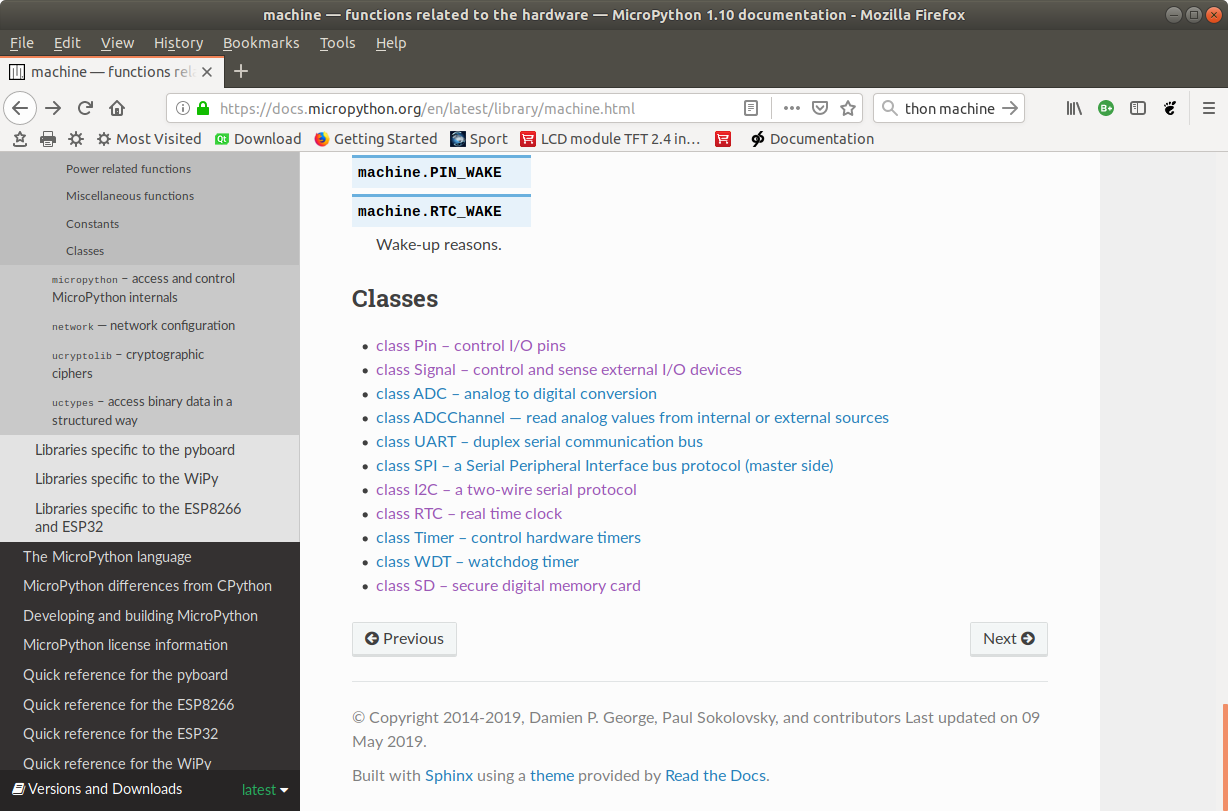
The machine.Pin class

pinClass.png

Slide 24 of 64

Switch the LED on, version 1

ledControl1.png

Slide 25 of 64

Switch the LED on, version 2

ledControl2.png

Slide 26 of 64

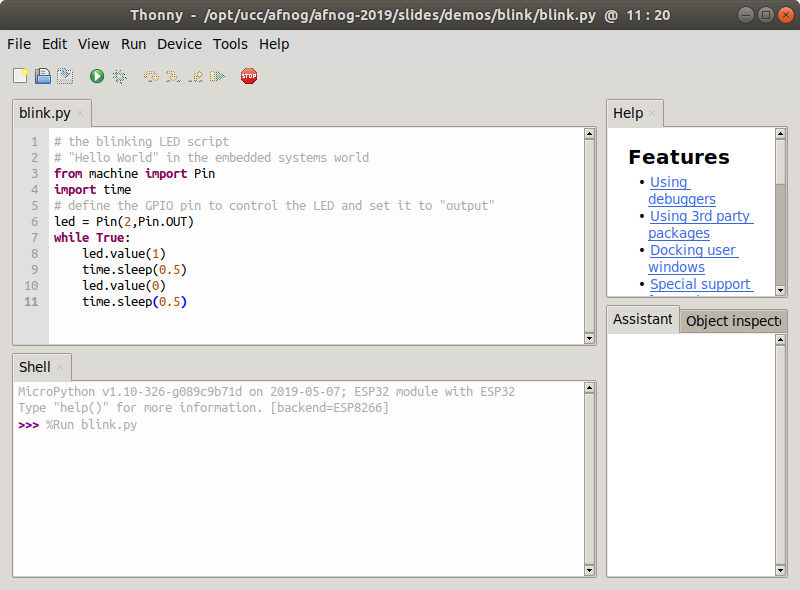
The blinking LED

Now we put the code into a script and run it
blinkingLed.png

Slide 27 of 64

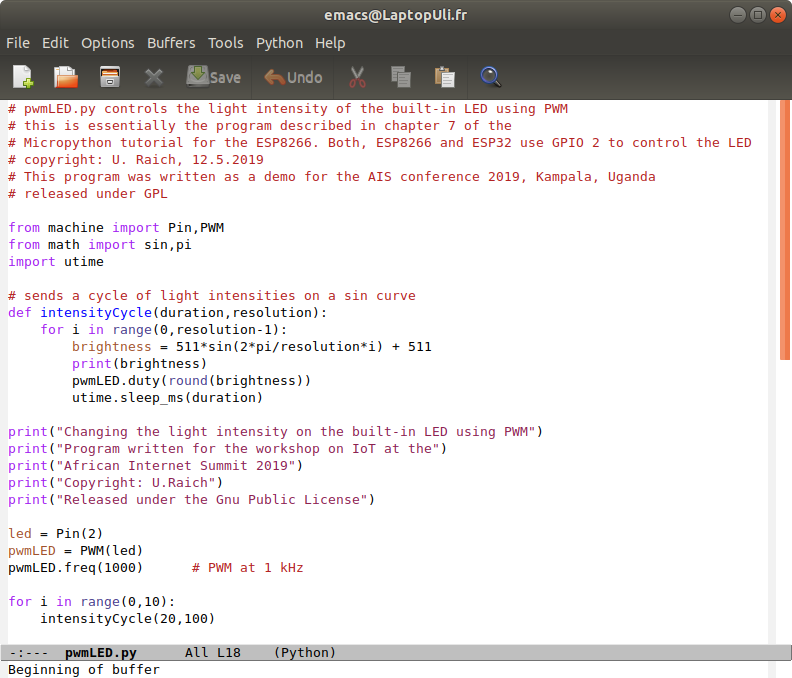
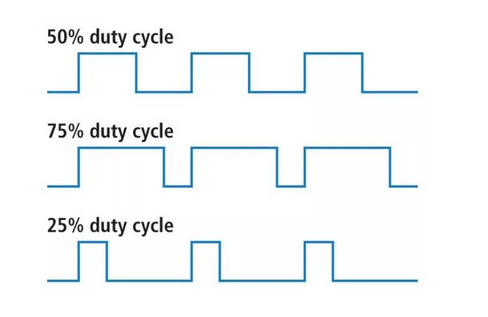
Changing the light intensity

The LED is connected to a digital line which can only be set to 0 or Vcc.

How can we change the light intensity and dim the LED?

The light intensity depends on the average current flowing through the LED.

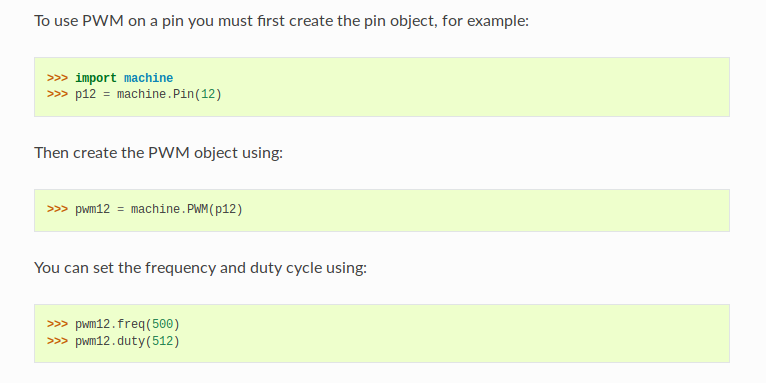
The answer is PWM: pulse width modulation.
pwm.png

Slide 28 of 64

PWM in Micropython

pwm_uP.png

Slide 29 of 64

Our PWM implementation

pwmImpl.png

Slide 30 of 64

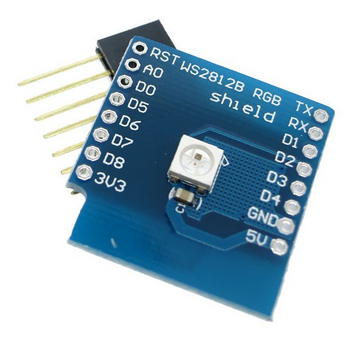
The WS2812B LED

A more complex LED:

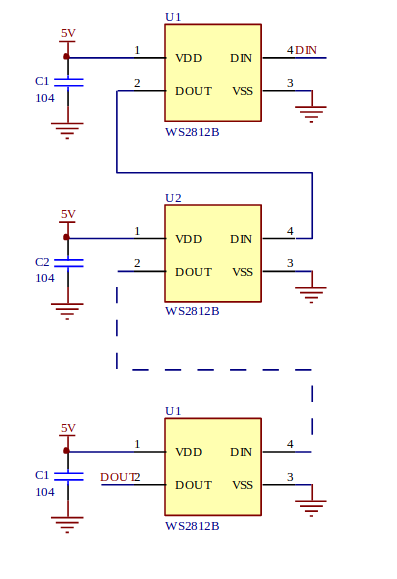
  • rgb LED used in LED chains.

  • each ws18b12 contains the 3 colored LEDs and a controller.

  • Can be cascaded and individually addressed, depending on its position in the chain

  • Needs precise timing

  • To use it we pass through the neopixel library built into micropython

Slide 31 of 64

WS2812B timing

For all the details on the ws2812b look at

https://cdn-shop.adafruit.com/datasheets/WS2812B.pdf

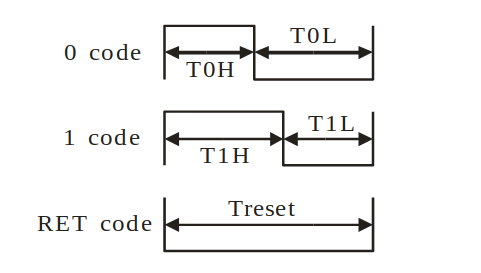
24 bit of colour data puts 2e24 colours at your disposal

Coding of a single bit
ws2812Bits.png

The control word:

ws2812ControlWord.png

Slide 32 of 64

Cascading the WS2812B

ws2812Chain.png

Slide 33 of 64

Using the neopixel library

neopixel.png

Slide 34 of 64

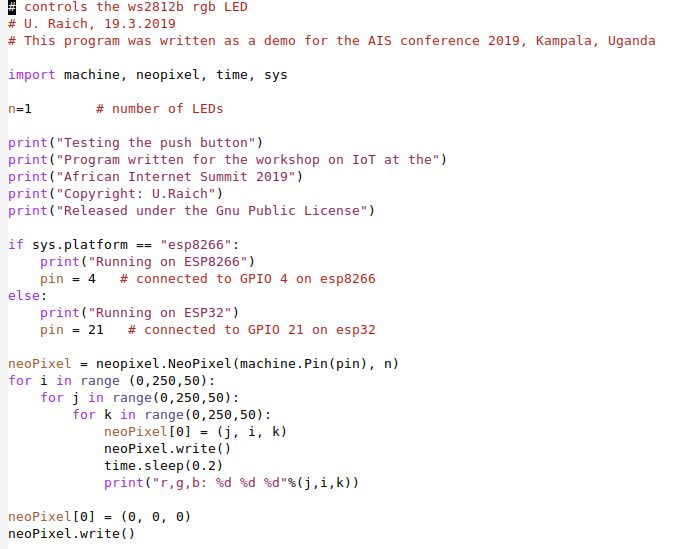
\x85 and our code

We have a single neopixel connected to

GPIO pin 4 (ESP8266)

or

GPIO pin 21 (ESP32)

This code works on both CPUs!
neopixelCode.png

Slide 35 of 64

The I2C bus

I2C stands for Inter-Integrated-Circuit. It was invented by Philips Semiconductor

in 1982. Slow, short distance.

Quite a number of sensors in the "WeMos D1 sensor shield collection use the I2C bus
  • SHT30 temperature and humidity sensor
  • DS1307 real time clock
  • The BMP180 barometric pressure and temperature sensor

  • The SSD1306 OLED (Organic Light Emitting Diode) display

Slide 36 of 64

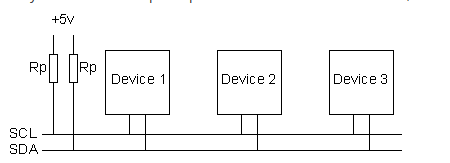
The physical bus

The CPU (master) connects to the sensors (slaves) through

2 digital lines:

  • SCL: the clock
  • SDA: the data

i2cBus.png

Slide 37 of 64

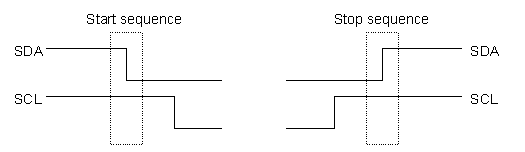
I2C start and stop sequence

When the master want to talk to the slave it issues a start sequence

It terminates the transfer with a stop sequence
i2cStartStop.png

Slide 38 of 64

I2C addressing

When talking to a slave the master sends a seven bit address

followed by a read/write bit

This allows to access at most 128 devices

i2cAddress.png

Slide 39 of 64

I2C data transfer

Data is transmitted 8 bits at a time followed by an acknowledge bit.

If acknowledge is low, transfer ok, otherwise: send stop sequence

i2cData.png

Slide 40 of 64

I2C write cycle

  • Send start sequence
  • Send I2C address and R/W bit low
  • Send internal register number
  • Send data byte
  • Optionally send further data bytes
  • Send stop sequence

Slide 41 of 64

I2C read cycle

  • Send start sequence
  • Send slave address with R/W low
  • Send address of internal register
  • Send a start sequence again
  • Send slave address with R/W high
  • Read data byte
  • Send stop sequence

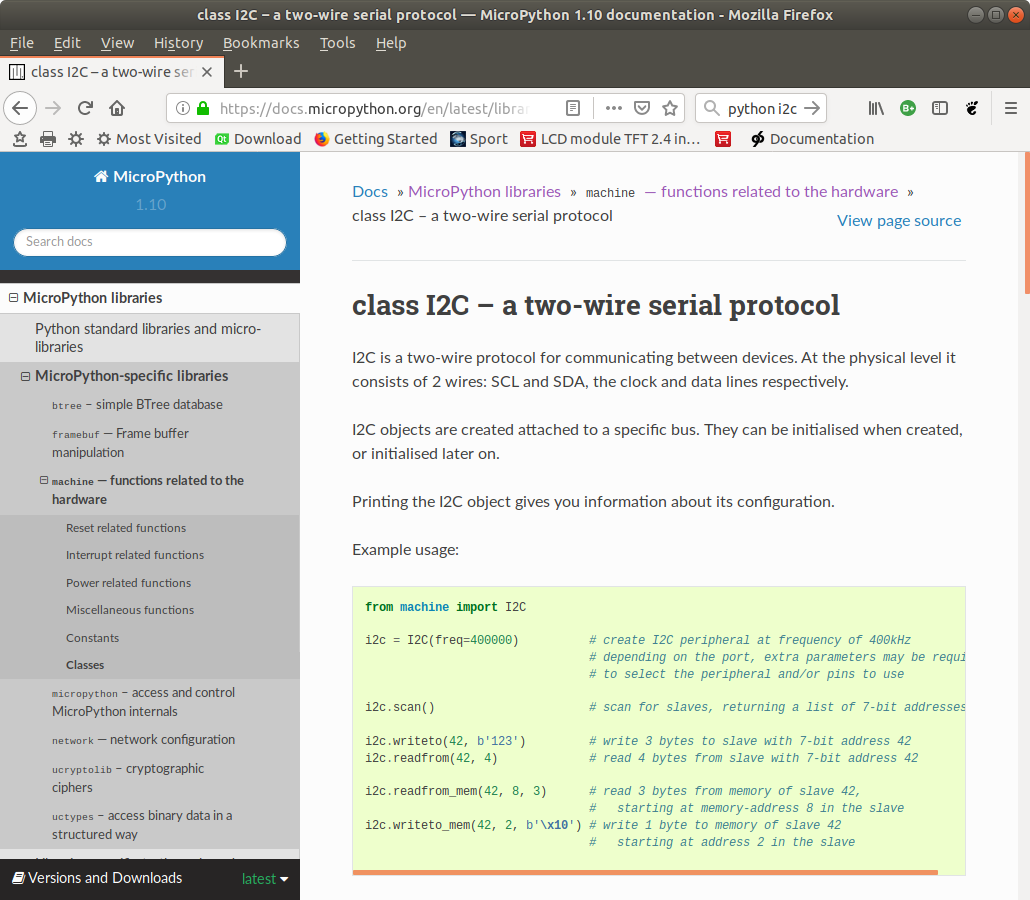
Slide 42 of 64

I2C in Micropython

i2c_uP.png

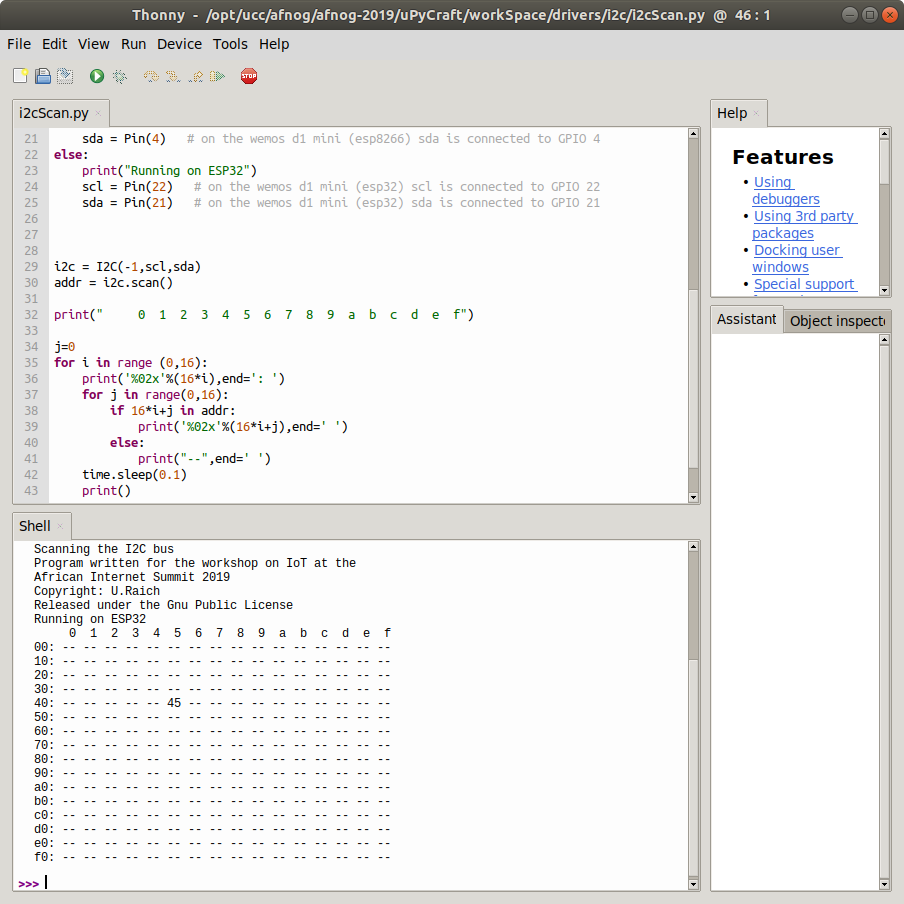
Slide 43 of 64

Scanning the I2C bus

i2cScan.png

Slide 44 of 64

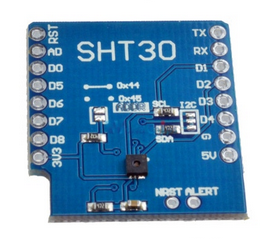
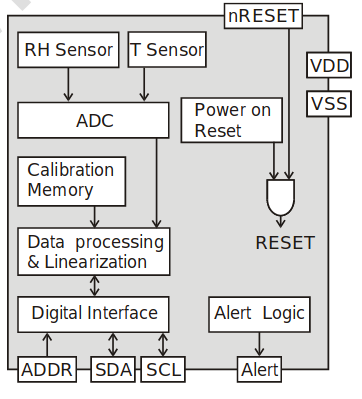
The SHT30 digital temperature and relative humidity sensor

The SHT30 is a digital temperature and humidity sensor based on the I2C bus

Here is its data sheet.

Temperature precision: +- 0.3 \xB0C

Relative humidity: +- 3 %

Works on 2.4V \x96 5.5 V
sht30Block.png

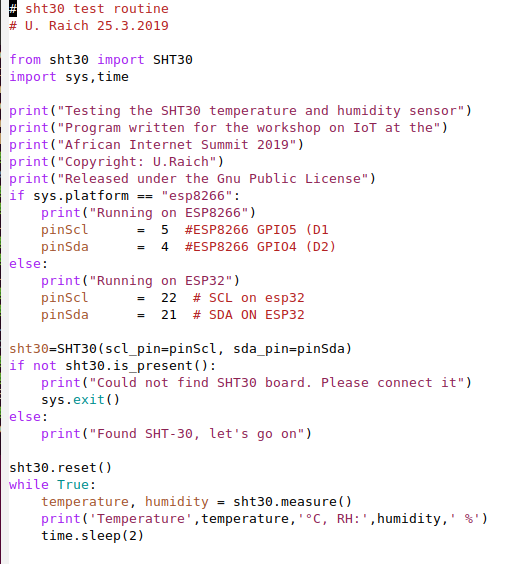
Slide 45 of 64

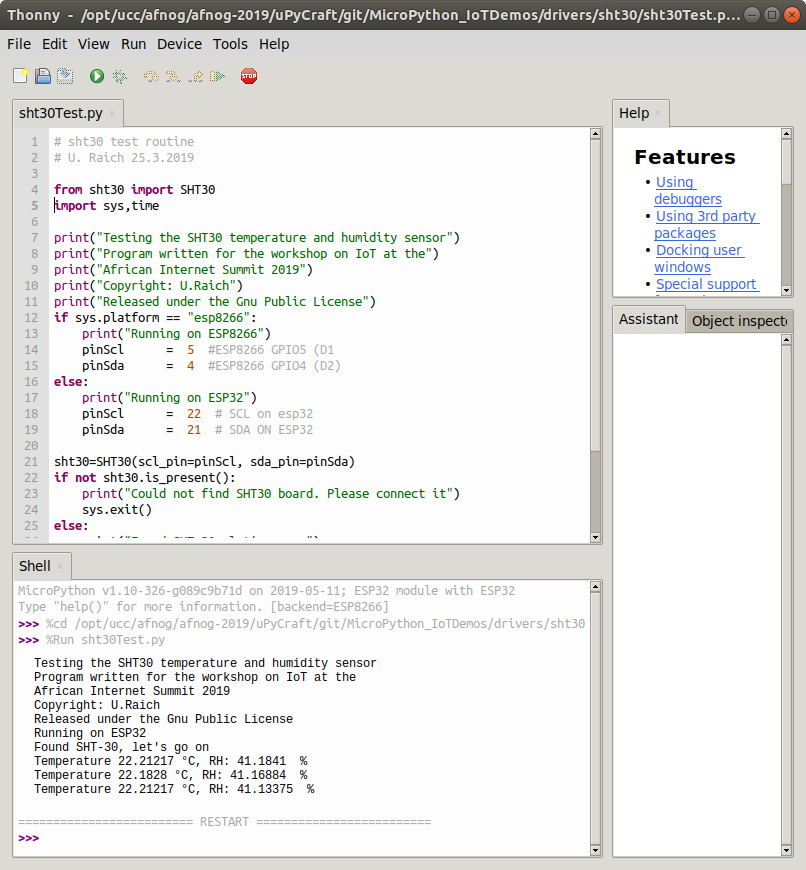
Reading out the SHT30

sht30Code.png

Slide 47 of 64

Results from the SHT30

sht30Results.png

Slide 48 of 64

Where to find the demo code

While for the course we only use the CPU and 2 sensor shields:

  • ESP8266 CPU (a more powerful ESP32 CPU exists)
  • SHT30 temperature and humidity sensor
  • Ws2812B rgb LED (neopixel) there are many more available on the market.

    We have a dozen such shields here for demo.

    All demo programs can be found at:

    https://github.com/uraich/MicroPython_IoTDemos

Slide 49 of 64

WeMos D1 mini sensor and actuator shields (1)
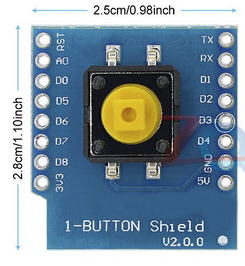
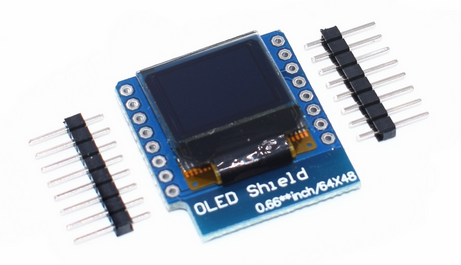
wemosButton.png wemosWS2812.png wemosOLED.png
Pushbutton WS2812 cascadable rgb LED SSD1306 OLED display
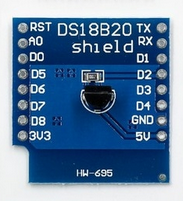
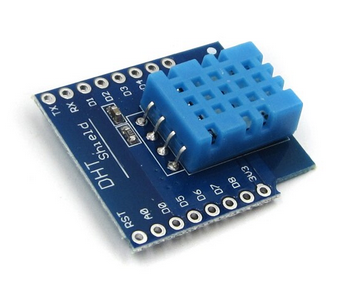
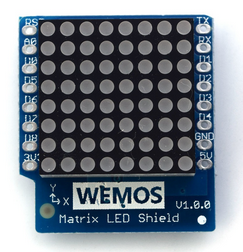
wemosDS18B20.png wemosDHT11.png wemosLedMatrix.png
DS118B20 temperature sensor DHT11 temperature and relative humidity sensor 8x8 LED Matrix

Slide 50 of 64

Wemos D1 mini sensor and actuator shields (2)
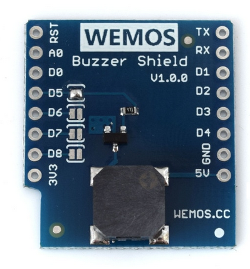
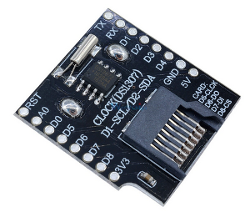
wemosBuzzer-v2.png wemosDataLogger-v2.png wemosSHT30.png
Passive Buzzer Data Logger SHT30 temperature and humidity sensor
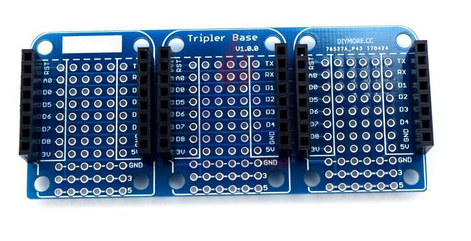
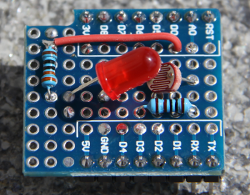
tripleBase.png proto.png
triple base my prototype board: LED + photo resistor

Slide 51 of 64

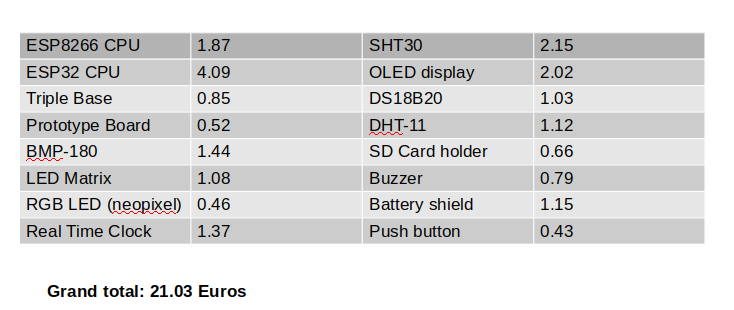
Cost

cost.png

Slide 52 of 64

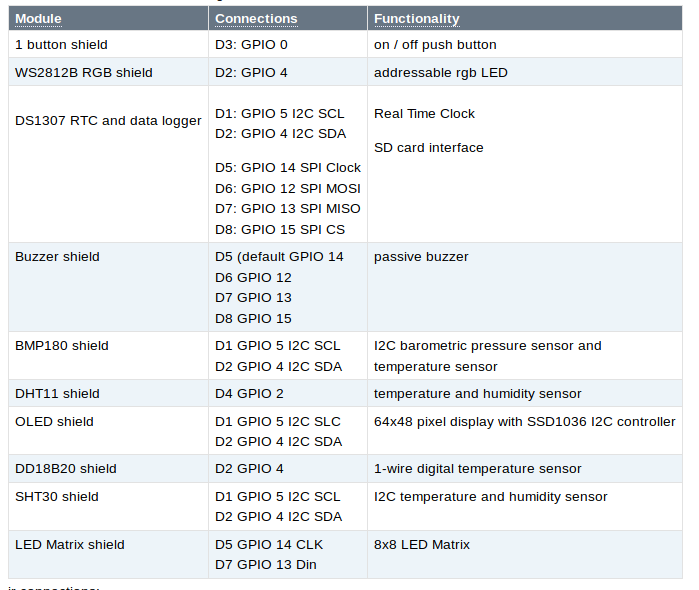
Pinouts of shields

shieldPins.png

Slide 53 of 64

Documentation for the demo programs

Demo programs for all the shields are available on github:

https://github.com/uraich/MicroPython_IoTDemos

A short description of every program can be found in the README

Slide 54 of 64

The data logger

The data logger features a DS1307 Real Time Clock (RTC) backed up by a battery

An SD card socket also provided.

This allows to store large amounts of data locally

The RTC keeps the time and measurements can be supplied with a time tag

Programs to set and read the RTC are provided.

One of the programs setting the RTC gets the time from and NTP server

such that manual specification of the current date and time are not needed.

wemosDataLogger-v2.png
https://github.com/uraich/MicroPython_IoTDemos/tree/master/drivers/ds1307

Slide 55 of 64

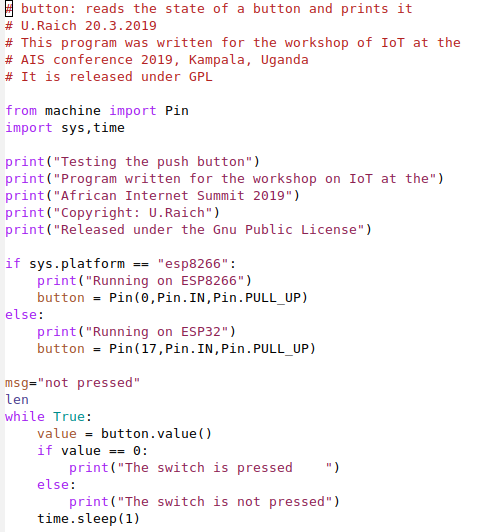
The push button shield

pushbuttonCode.png wemosButton.png

Slide 56 of 64

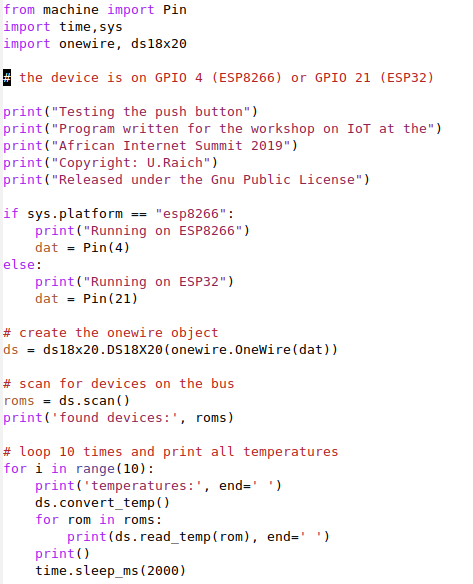
DS18B20 shield

ds18b20Code.png wemosDS18B20.png
   

Slide 57 of 64

SSD1306 48x64 OLED display

This one is also an I2C device


It provides 48*64 pixels and allows to

  • Write a few characters of text
  • Do simple graphics
The ssd1306 class inherits from the


framebuf class included in Micropython such that all

drawing methods of the framebuf are available for drawing:


https://docs.micropython.org/en/latest/library/framebuf.html


For an example see:

https://github.com/uraich/MicroPython_IoTDemos/tree/master/drivers/oled

wemosOLED.png

Slide 58 of 64

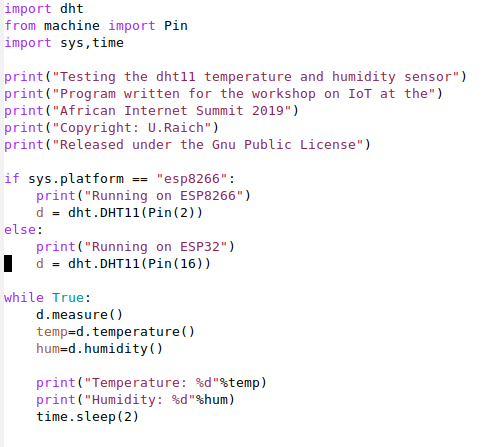
The DHT11 shield

dht11Code.png wemosDHT11.png
The DHT11 is a digital temperature
and relative humidity sensor. It uses
a proprietary protocol of
communication with its controlling
host implemented in the
dht.DHT11 class

Slide 59 of 64

The LED matrix

The LED matrix has 8x8 LEDs on it, which can individually be switched on or off.

In addition to the mled class which takes care of the communication between the host

and the device and which has classes to clear the display,

set a pixel on or off and to change the brightness,

I wrote a class matrix which takes a number 0..64 and

lights this number of LEDs starting from bottom left

wemosLedMatrix.png

Slide 60 of 64

The buzzer

This shield implements a passive buzzer.

A passive buzzer takes a frequency(an active buzzer takes a signal level)

and produces a sound at this frequency.


This means that the frequency can be changed and a tune can be played.

In

https://github.com/uraich/MicroPython_IoTDemos/tree/master/drivers/buzzer

you will find a program interpreting songs on

RTTTL (Ring Tone Text Transfer Language)

and playing these on the buzzer

A small song library is also provided

wemosBuzzer-v2.png

Slide 61 of 64

The prototype module

This is a home build module featuring a photo-resistor

measuring the light intensity impinging on it.

It provides an analogue value converted to digital

by the ADC on the WeMos D1 CPU

Please note that the ESP8266 has a single 10 bit ADC

while the ESP32 has 3 12 bit ADCs.

A MUX provides up to 18 analogue channels


The light intensity can be changed with an LED

proto.png

Slide 62 of 64

The triple base

This module allows to easily stack a rather larger number of shields to a sandwich.

Make sure however that the GPIO lines used by the modules do not clash

tripleBase.png

Slide 63 of 64

Exercises

Now it is up to

You

to do the work!


The exercises are here:

https://afnog.iotworkshop.africa/do/view/AFNOG/Session2

Slide 64 of 64