
MQTT and Cayenne
Exercise 1:
Install mosquitto on your machine. On Ubuntu Linux this can very easily be accomplished with apt. Try the mosquitto communication:-
Start the mosquitto broker
-
Start mosquitto_sub subscribing to the \x93DCSIT\x94 topic
-
Start mosquitto_pub publishing some message to the topic \x93DCSIT
-
observe the message being seen in mosquitto_sub
Exercise 2:
Write you own MQTT client in Python publishing a message to \x93DCSIT\x94 every 2 s. Have a look at the umqtt.simple class to see how to accomplish this. Write the program and start it with thonny. You must know the IP address of the machine on which your mosquitto broker is running. Use ifconfig to find out.
Subscribe to the \x93DCSIT\x94 topic with mosquitto_sub and observer that the messages are arriving.
Write an MQTT client that subscribes to the \x93DCSIT\x94 topic and that prints messages coming in.
Write a program controlling a LED. Use messages \x93LED on\x94 and \x93LED off\x94 to control the LED.
Exercise 3:
Register a user on https://mydevices.com/cayenne/signup.
Watch the introductory film and have a look at the documentation pages.
Add a device by clicking on \x93Bring Your Own Thing\x94. Have a look at your Cayenne credentials.
Exercise 4:
Write a program connecting to Cayenne. Observe that the dashboard is coming up.Exercise 5:
Write a program that sends dummy temperature values to Cayenne on channel 0. The temperature values should range from 25\xB0C to 35\xB0C (typical Ghanaian temperatures). Use the random number generator in MicroPython to make the values vary. Wait for 2 s minimum between each value. Observe the widget coming up on the dashboard. Fix the widget on the dashboard and change the widget parameters (e.g. the name).Exercise 6:
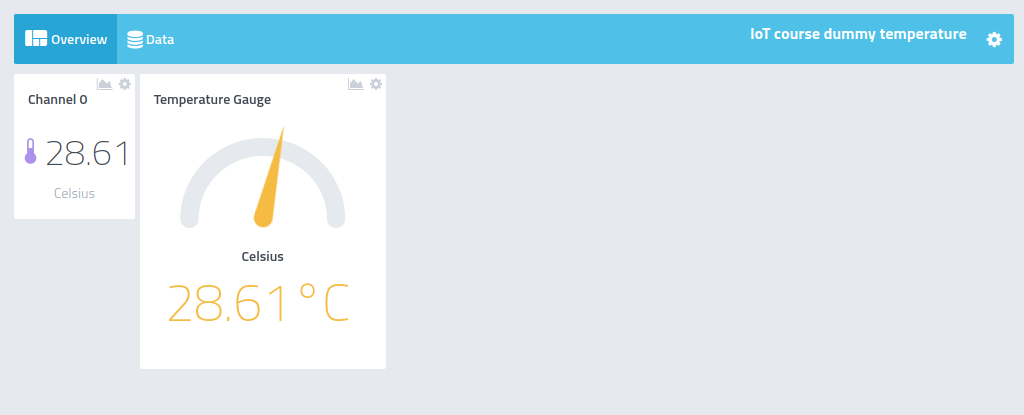
Add a gauge widget with ranges 0 .. 50 \xB0C. Run your program sending the dummy temperatures and observe how the dashboard displays them.Here is a screen dump showing the result:
Exercises 7:
Create a slider and a push button on your dashboard.Exercise 8:
Create a temperature and a humidity widget on the Cayenne dashboard. Write a program that connects to Cayenne and sends temperature and humidity values read from the SHT30 to Cayenne every 5s. Observe the measurements on the dash board. Add two line charts for temperature and humidity and observe how the plots evolve over time. You may also try to download the measurements saved on the plots.Exercise 9:
Add a push button to the dashboard and connect it to the built-in LED on the ESP32 CPU board. Try to switch the LED on and off using this button. The dashboard should now look like this: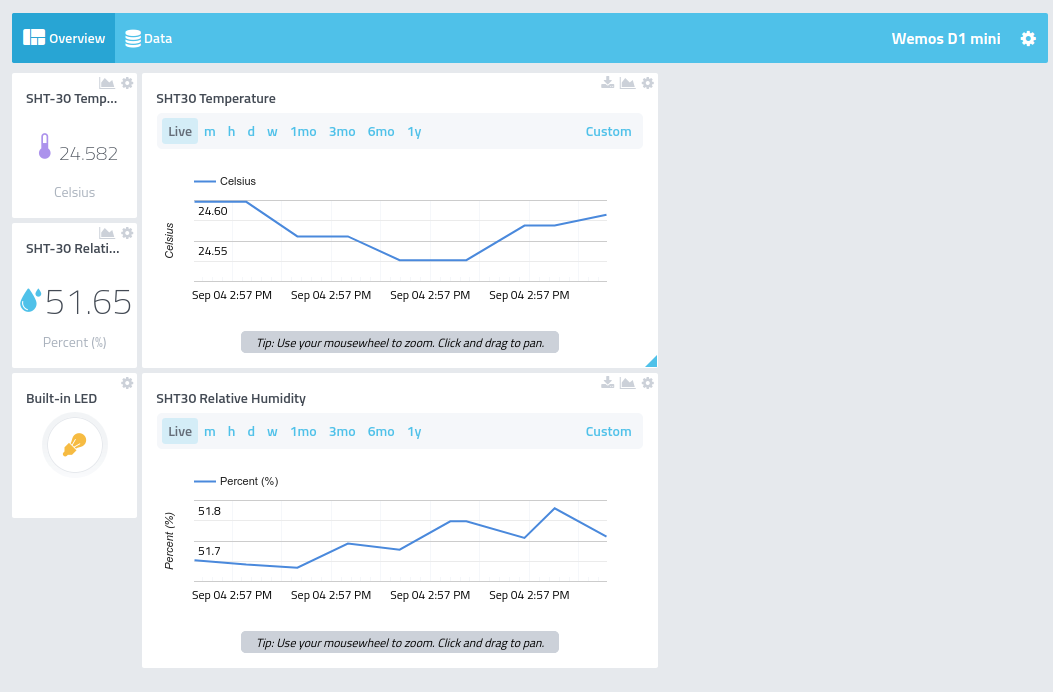 As you can see, the LED is currently switched on.
Exercise 10:
Create 4 sliders on the dashboard. The first one will select one of the 7 LEDs on the WS2812 RGB LED chain while the other 3 will select the red, green and blue component for the LED selected. With the settings in the screen dump below we will get a light blue color on LED1 (top LED in the ring).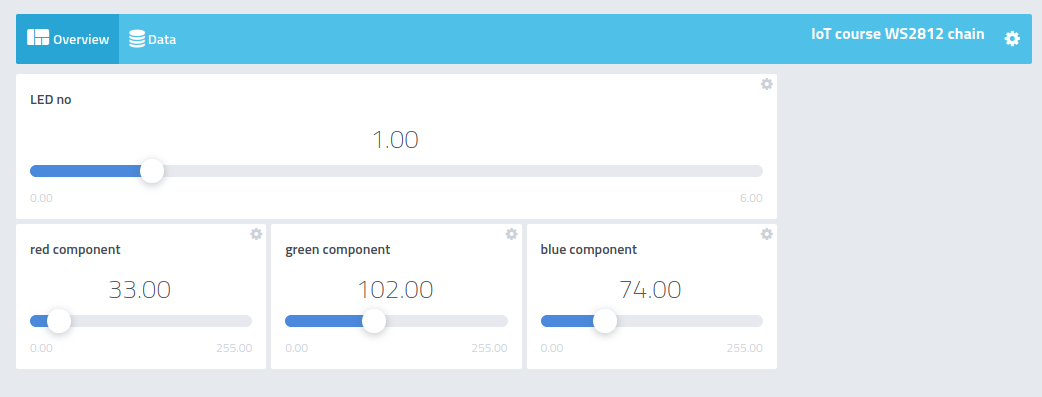 -- %USERSIG{UliRaich - 2020-09-02}%
Comments


| I | Attachment | Action | Size | Date | Who | Comment |
|---|---|---|---|---|---|---|
 png |
cayenneDummy.png | manage | 27 K | 05 Sep 2020 - 14:47 | UnknownUser | |
| png |
dashboard.png | manage | 68 K | 04 Sep 2020 - 12:58 | UnknownUser | |
| png |
ws2812Cayenne.png | manage | 26 K | 05 Sep 2020 - 13:59 | UnknownUser |






Topic revision: r4 - 05 Sep 2020, UliRaich