Difference: SystemInstallation (3 vs. 4)
Revision 42016-03-22 - uli
| Line: 1 to 1 | |||||||||
|---|---|---|---|---|---|---|---|---|---|
Installing an Ubuntu System on an external USB drive and making it bootableAs a first step when preparing a development environment for Android tablet systems one must prepare an operating system on which all the development software will be running. For the course at UCC we will use the latest Ubuntu Linux system, which we install on a bootable external USB hard drive. Before starting system installation the 64bit version of the Ubuntu desktop system (ubuntu-14.04.1-desktop-amd64.iso at the time of writing) is downloaded from ubuntu.com/download and transferred to a DVD or installed on a USB memory stick. If you have a running Ubuntu system then this can easily be accomplished with the usb-creator-gtk program. The DVD or memory stick contains a live Ubuntu system which can be used to get acquainted with Ubuntu without touching the operating system currently running on the computer. Once we get to grips with the new system we install it onto an external USB hard drive. Clicking the “install Ubuntu” button on the desktop or rebooting the DVD or memory stick and selecting “Installation” instead of “Live system” starts the installation. | |||||||||
| Changed: | |||||||||
| < < |  | ||||||||
| > > |  | ||||||||
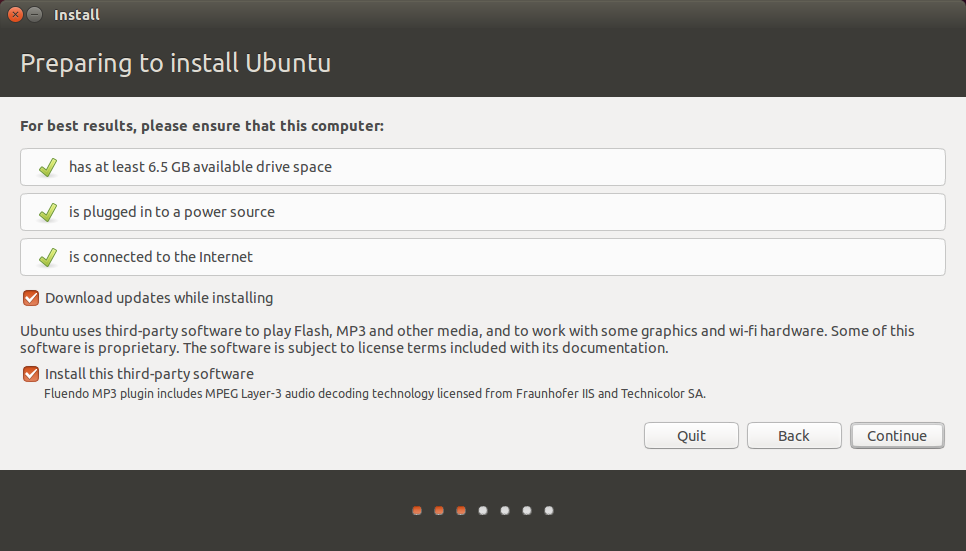
| After clicking continue we should get the window shown above. I selected to update immediately and to install third party software. | |||||||||
| Changed: | |||||||||
| < < |  | ||||||||
| > > |  | ||||||||
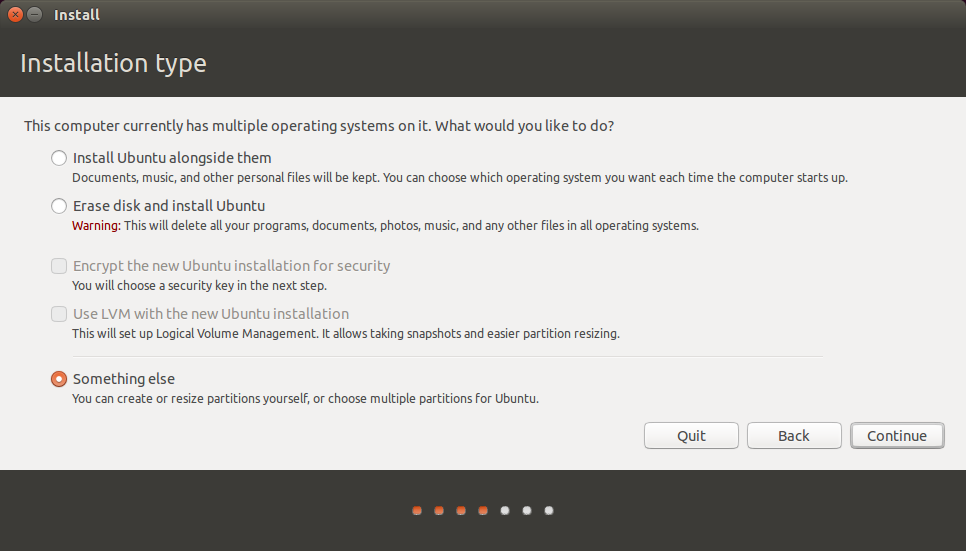
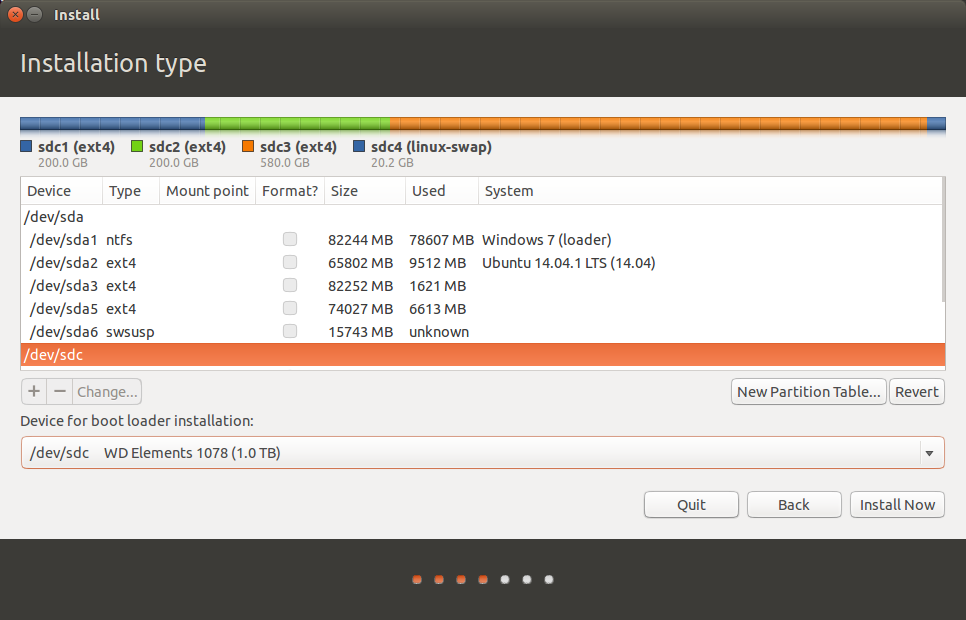
| Do not install Ubuntu alongside e.g. Windows and clearly don't erase the disk and install but select the something else option. This brings up the Installation Type window. If you started from a new disk (as I did), first create a new partition table partitioning the USB disk (1TB) as shown below: | |||||||||
| Changed: | |||||||||
| < < |  | ||||||||
| > > |  | ||||||||
This is the partition layout:
| |||||||||
| Line: 20 to 20 | |||||||||
| |||||||||
| Changed: | |||||||||
| < < |  | ||||||||
| > > |  | ||||||||
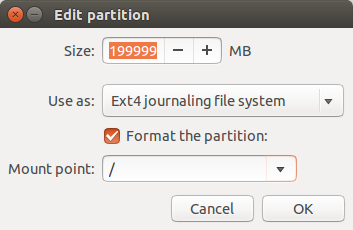
| In the Installation Type window, selecting a partition (in my case e.g. /dev/sdc1 because the USB drive is seen as /dev/sdc) and clicking Change brings up the window above on which you can select the mount point (/dev/sdc1 is the root partition), the file system type and if the partition must be formatted or not. Be sure to select your USB hard drive as disk on which the boot loader will be installed (/dev/sdc in my case). | |||||||||
| Line: 35 to 35 | |||||||||
| Finally we want to customize our system with a nice SplashScreen. Once the system boots nicely as we expect we can start to install AdditionalSoftware. | |||||||||
| Added: | |||||||||
| > > |
| ||||||||
Ideas, requests, problems regarding TWiki? Send feedback