Difference: SevenSegmentDisplayAndKeypad (1 vs. 7)
Revision 72021-01-24 - UliRaich
| Line: 1 to 1 | ||||||||
|---|---|---|---|---|---|---|---|---|
Seven Segment Display and KeypadThe Seven Segment Display and its TM1637 controller | ||||||||
Revision 62021-01-22 - UliRaich
Revision 52021-01-22 - UliRaich
| Line: 1 to 1 | ||||||||
|---|---|---|---|---|---|---|---|---|
Seven Segment Display and KeypadThe Seven Segment Display and its TM1637 controller | ||||||||
| Line: 65 to 65 | ||||||||
Scan the keyboard in intervals of 100 ms and print the key that is pressed. This will result in printing the key as long as it is pressed.
Exercise 2: | ||||||||
| Changed: | ||||||||
| < < | Wait until the key is released and only the print the key. This will result of a single key value for each button press. | |||||||
| > > | Wait until the key is released and only then print the key. This will result in a single key value for each button press. | |||||||
Exercise3: | ||||||||
| Changed: | ||||||||
| < < | Read the keypad in an interrupt driven routine. Keep the pressed keys in a circular buffer. Add the following methods:
Comments | |||||||
| > > | Write a CircularBuffer class in which you can keep key presses. This will allow to read the keypad completely asynchronously (see exercise 4).
The CircularBuffer class should implement a buffer of 32 elements with the following methods:
Exercise 4:Read the keypad in an interrupt driven routine. Keep the pressed keys in the circular buffer written in exercise 3. Write a test program that starts the interrupt driven keypad driver and reads data from the circular buffer in rather large intervals (e.g. every 5s or 10s) | |||||||
Revision 42021-01-21 - UliRaich
| Line: 1 to 1 | |||||||||||||||||
|---|---|---|---|---|---|---|---|---|---|---|---|---|---|---|---|---|---|
Seven Segment Display and KeypadThe Seven Segment Display and its TM1637 controller | |||||||||||||||||
| Line: 49 to 49 | |||||||||||||||||
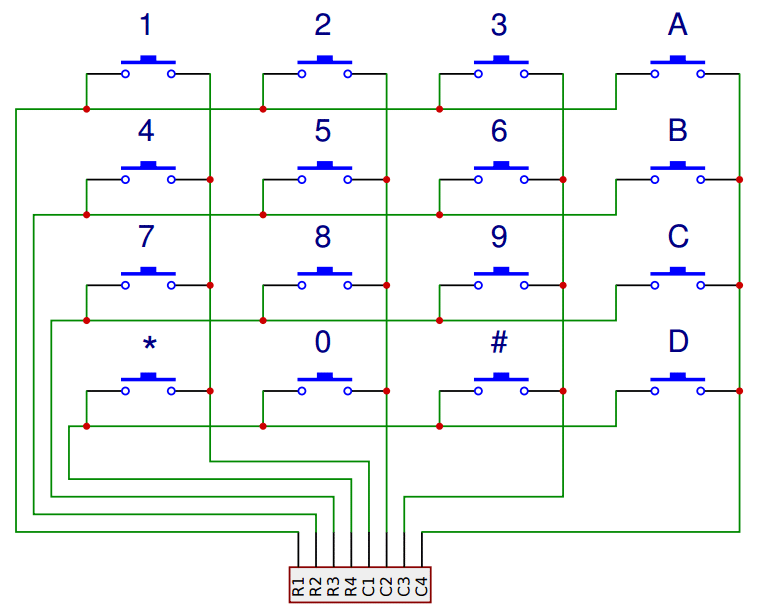
| The job will be to find out which column makes a connection to which row in order to find out which switch is closed. This can be done by connecting e.g. the 4 row pins to GPIO outputs and the 4 column pins to GPIO inputs with pull-ups. Set the first row pin to low and check on each column pin if you read a zero. If you do, you have found the switch closed. If not, continue the same procedure on the other row pins. | |||||||||||||||||
| Added: | |||||||||||||||||
| > > |
I made the connections as follows:
Exercise 1:Scan the keyboard in intervals of 100 ms and print the key that is pressed. This will result in printing the key as long as it is pressed.Exercise 2:Wait until the key is released and only the print the key. This will result of a single key value for each button press.Exercise3:Read the keypad in an interrupt driven routine. Keep the pressed keys in a circular buffer. Add the following methods:
| ||||||||||||||||
Comments | |||||||||||||||||
Revision 32021-01-21 - UliRaich
| Line: 1 to 1 | ||||||||
|---|---|---|---|---|---|---|---|---|
Seven Segment Display and KeypadThe Seven Segment Display and its TM1637 controller | ||||||||
| Line: 19 to 19 | ||||||||
| Carefully read the data sheet. | ||||||||
| Changed: | ||||||||
| < < | Write a driver implementing the serial protocol. Implement he driver as class TM1637 with the following methods: | |||||||
| > > | Write a driver implementing the serial protocol. Implement the driver as class TM1637 with the following methods: | |||||||
| ||||||||
| Changed: | ||||||||
| < < |
| |||||||
| > > |
| |||||||
      A
--- | ||||||||
Revision 22021-01-21 - UliRaich
| Line: 1 to 1 | ||||||||
|---|---|---|---|---|---|---|---|---|
Seven Segment Display and KeypadThe Seven Segment Display and its TM1637 controller | ||||||||
| Line: 19 to 19 | ||||||||
| Carefully read the data sheet. | ||||||||
| Changed: | ||||||||
| < < | Write a driver implementing the serial protocol. Check the acknowledge signal from the controller to make sure the data have been correctly transmitted. The signals on the dio and the clk lines must be programmed setting the corresponding GPIO pins. Serialization is also done in software. Write a test routine that displays 1234 on the seven segment digits. | |||||||
| > > | Write a driver implementing the serial protocol. Implement he driver as class TM1637 with the following methods:
      A
     ---
  F |   | B      dp,g,f,e, d,c,b,a: the data byte
     -G-
  E |   | C
     ---
      D
| |||||||
Exercise 2: | ||||||||
| Deleted: | ||||||||
| < < | Modify exercise 1 to implement a blinking colon
Exercise 3: | |||||||
Read the current time from the ntp and implement a clock displaying hours and minutes. Make the colon blink at a 1 Hz rate.
The Keypad | ||||||||
Revision 12021-01-20 - UliRaich
| Line: 1 to 1 | |||||||||||||||||||||||||
|---|---|---|---|---|---|---|---|---|---|---|---|---|---|---|---|---|---|---|---|---|---|---|---|---|---|
| Added: | |||||||||||||||||||||||||
| > > |
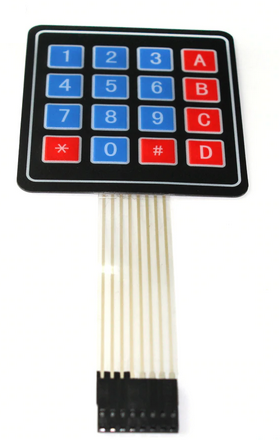
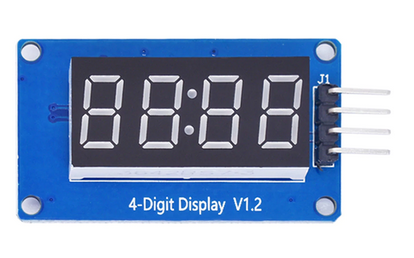
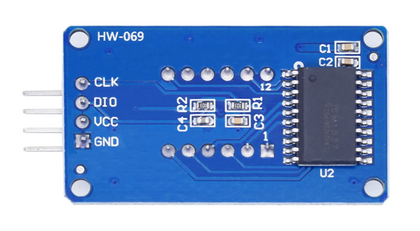
Seven Segment Display and KeypadThe Seven Segment Display and its TM1637 controllerThere is a nice and simple seven segment display controlled by a TM1637 controller, which can be used e.g. as a clock display. It provides 4 digits and a colon dividing digits 1 and 2 from digits 3 and 4, such that the first two digits can be used to display hours, the last two digits to display minutes and the colon can be set blinking at a 1 Hz rate. Of course you can also use it for other purposes like displaying the voltage values of a voltmeter.
Exercise 1:Carefully read the data sheet. Write a driver implementing the serial protocol. Check the acknowledge signal from the controller to make sure the data have been correctly transmitted. The signals on the dio and the clk lines must be programmed setting the corresponding GPIO pins. Serialization is also done in software.Write a test routine that displays 1234 on the seven segment digits. Exercise 2:Modify exercise 1 to implement a blinking colonExercise 3:Read the current time from the ntp and implement a clock displaying hours and minutes. Make the colon blink at a 1 Hz rate.The KeypadThe keypad has a total of 16 switches. These are connected to 8 pins organized as 4 rows and 4 columns.
Comments
| ||||||||||||||||||||||||
View topic | History: r7 < r6 < r5 < r4 | More topic actions...
Ideas, requests, problems regarding TWiki? Send feedback


