
Slide 1: Sensors for IoT devices … or A virtual world reflecting the real world
A 2 day tutorial with hands-on exercises
held during AFNOG 2018 in Dakar, Sénégal
Uli Raich (uli.raich@gmail.com)
Slide 2: The Internet
When the Internet was invented it was used for communications between humans Typical applications where:- Remote login
- File transfers
Slide 3: Microprocessors
When I started to work on microprocessors in the early 1980’s these were very simple devices containing just a single CPU and address and data lines + a few control lines to interface to external memory and I/O interfaces, typically : a serial and a parallel port.
The price for the chip was 176 US $. The development board was sold for 300 US $. You got 256 bytes of RAM, 2kBytes of EPROM and the serial and parallel port. Programming was done in assembly language or even straight machine code. No Internet!
Slide 4: An IoT device today
This year I bought this micro-controller: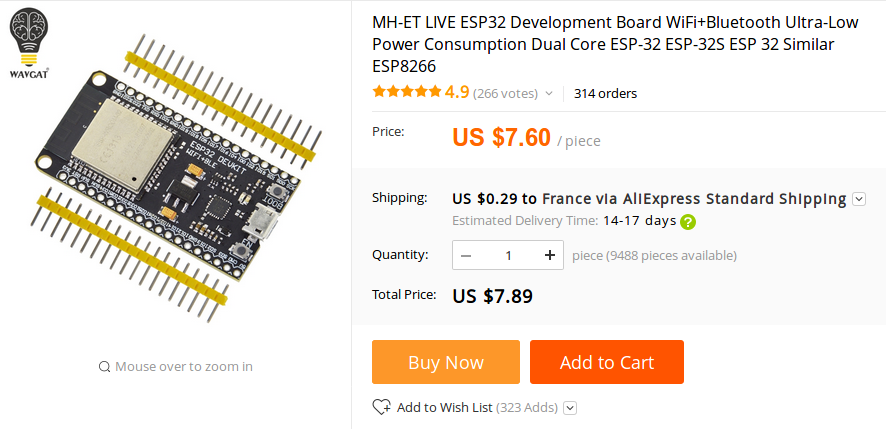
Slide 5: The specs

Slide 6: The Raspberry Pi
… and this is what we are going to use: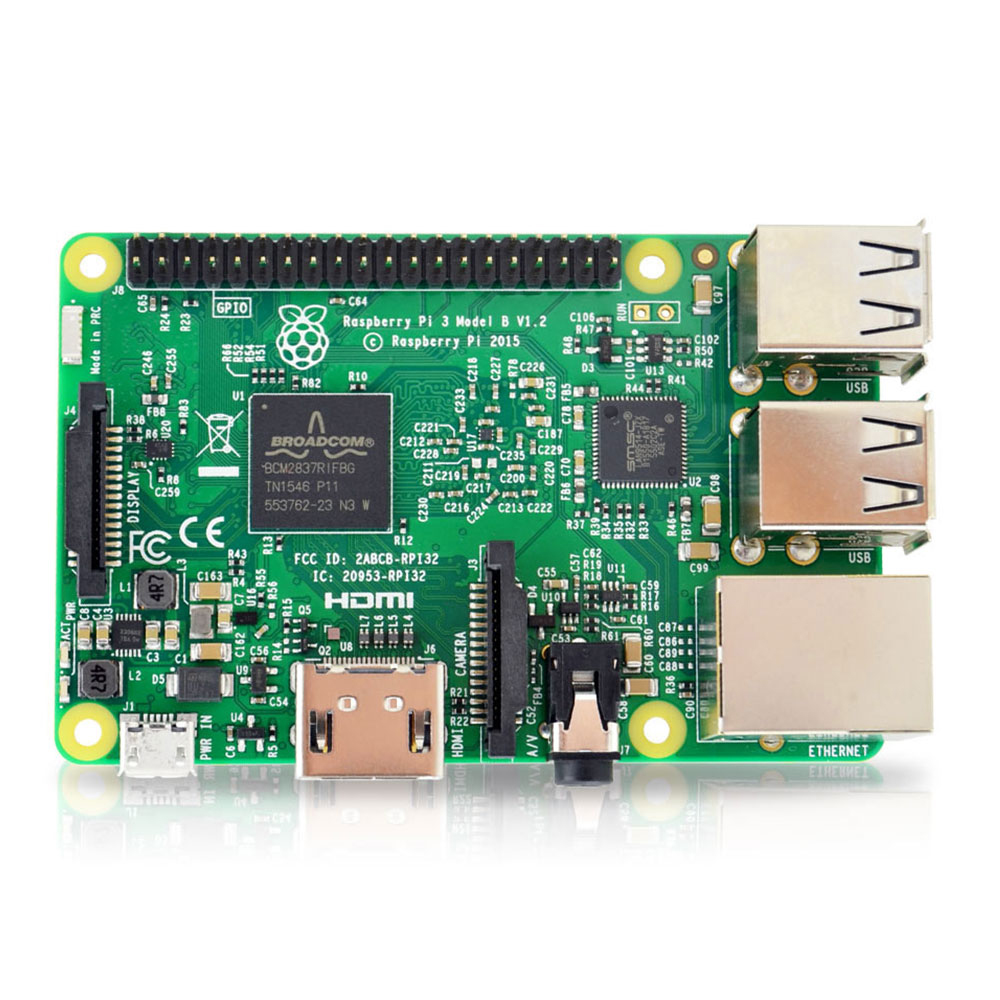
Slide 7: Official source of information
The Raspberry Pi has been sold at more than 8 million pieces! The user community is huge and is now increased by another 15 users! An enormous wealth of information on all sorts of subjects using the Raspberry Pi can be found on the WEB. The official site is https://www.raspberrypi.orgSlide 8: The TWiki server
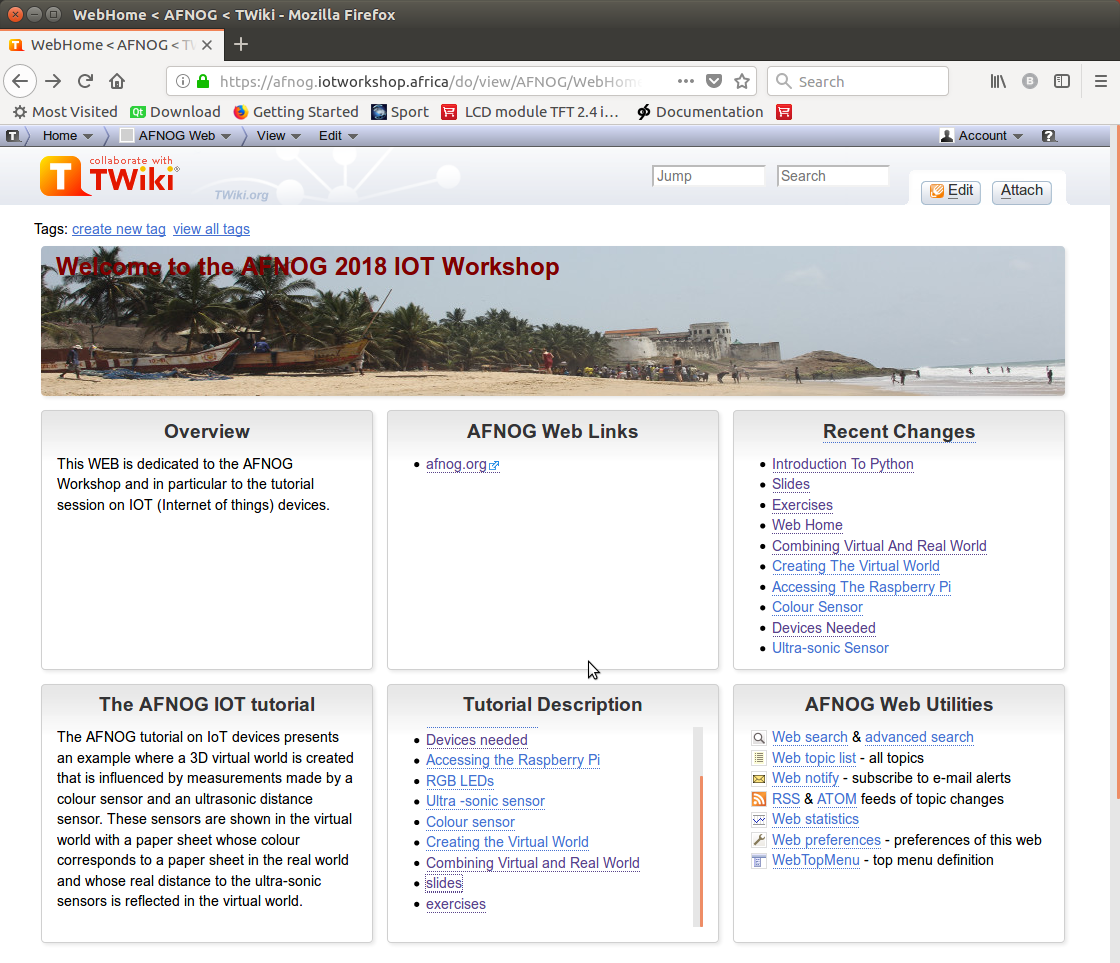
All information about this tutorial is available on a TWiki server. TWiki uses the same documentation format as Wikipedia. This makes it very simple for the lecturer to provide on-line documentation, which can be extended by students. This is our Twiki server: https://afnog.iotworkshop.africa/do/viewSlide 9: The TWiki server (2)
Slide 10: Specs and price
The price (35 US $) of this board is a bit higher but still much less than the m6800 development board. And this is what you get: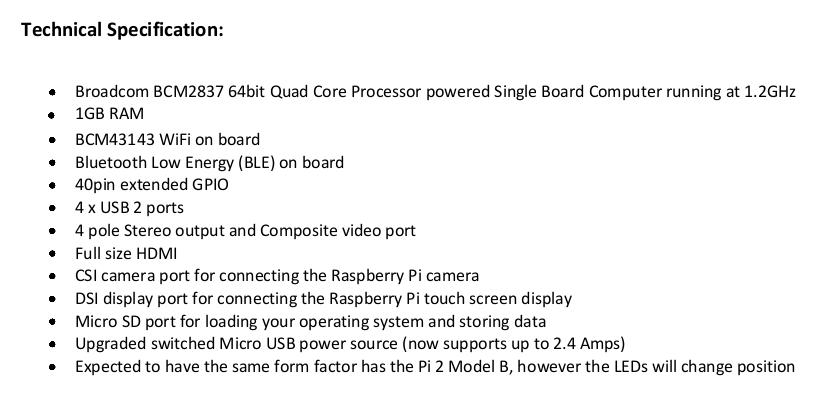
Slide 11: Interfaces and software
In addition to the GPIO (General Purpose I/O) you get- a serial interface
- I2C
- SPI
- an HDMI screen
- a USB keyboard and mouse
Slide 12: Programming
Since we have a full Linux system programming can be done- in C or C++
- Python
- or any language that Linux supports … and there are many!
Slide 13: Accessing the RPI remotely
Of course we can use the interfaces on the Raspberry Pi to connect a screen, keyboard and mouse and use it in stand-alone mode but we can also make use of the PC resources and access it remotely There are several ways to access the RPI remotely: Using the VNC server on the Pi you can access it with a remote desktop from the PC The secure shell (ssh) allows you to get a remote terminal in the Pi With scp you can copy files back and forth between the Pi and the PC With nfs you can mount part of the Pi file system into the PC file system tree and access the PI SD card as if it was a local PC disk.Slide 14: The remote Desktop
On the remote desktop the screen is replaced by the computer screen of the device connected to the RPI and the keyboard by this computer's keyboard. The connected computer acts like a graphics terminal for the RPI. You see on the computer exactly what you would see on a directly connected screen.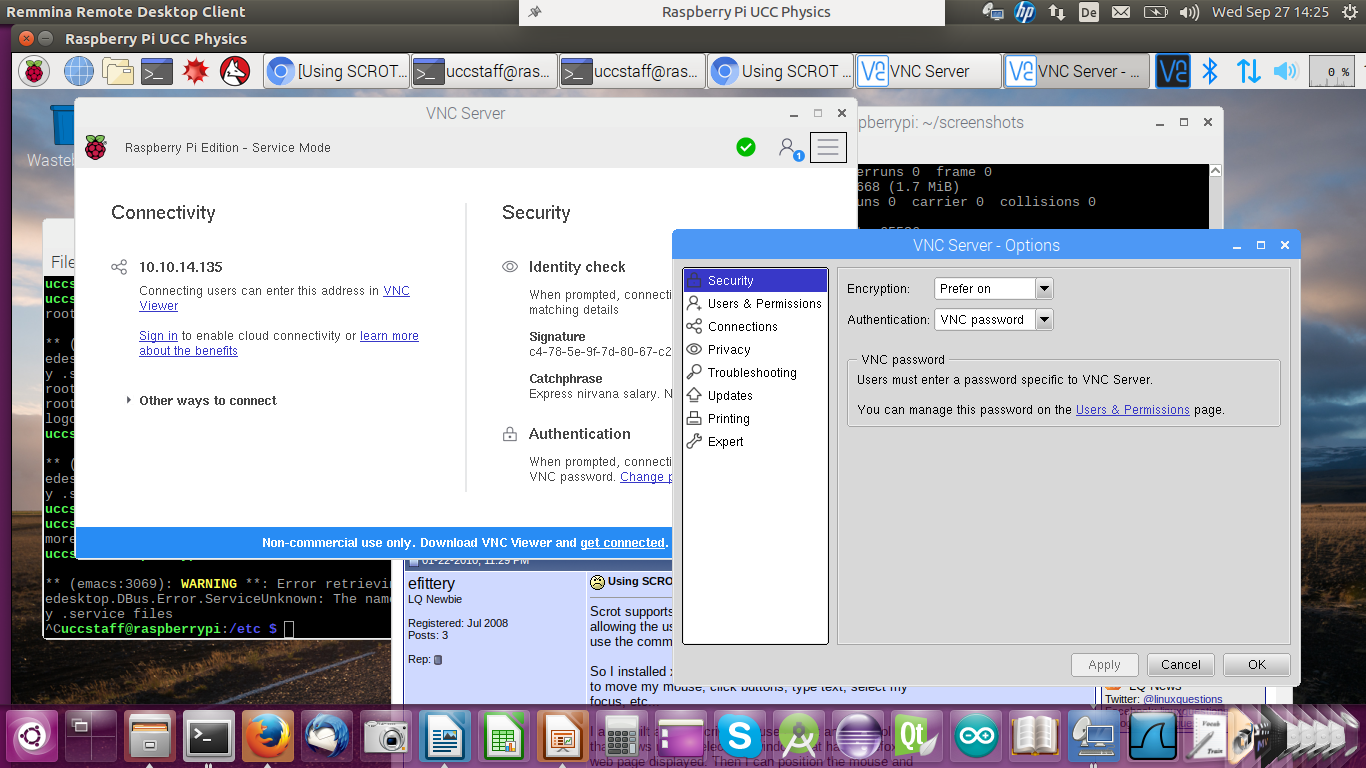
Slide 15: ssh
In the case of ssh you have a single terminal window that is connected to a shell on the Pi. The command is: ssh userOnPi@piIPaddress Where piIPaddress can be the Pi’s IP address or host name. If you specify the -X option you can run X-11 based programs where the X protocol is run over the ssh connection. For Windows computers you need PuTTY in conjunction with an X server (e.g. Xming) to connect to the RPiSlide 16: ssh(2)
Here you see a screen dump from the PC with a remote terminal that started an emacs session on the Pi
Slide 17: The Cobbler
As we have seen, the Raspberry Pi has a 40 pin connector onto which many interface signals are connected. We use a flat cable and a “cobbler” to bring these signals onto a bread board where we can build our own electronic circuits for acquisition or control by the Rpi. Libraries in C/C++, Java and Python are available easing software access to these signals.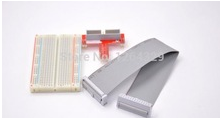
Slide 18: Programming the RPi
As already mentioned, the Raspberry Pi can be programmed in a large number of programming languages. One of the most fashionable languages is Python. Python is an interpreted language and code can be entered into a Python interpreter which executes it immediately. Like this, Python can e.g. be used as a calculator. It is however also possible to write whole programs (scripts) which the interpreter executes Want to learn Python? Try the Python tutorialSlide 19: Running the Interpreter

The quit() function exits the interpreter
Slide 20: idle
Instead of running a standard editor like vi or emacs you may want to run an Integrated Development Environment (IDE) created specifically for Python instead. Try idle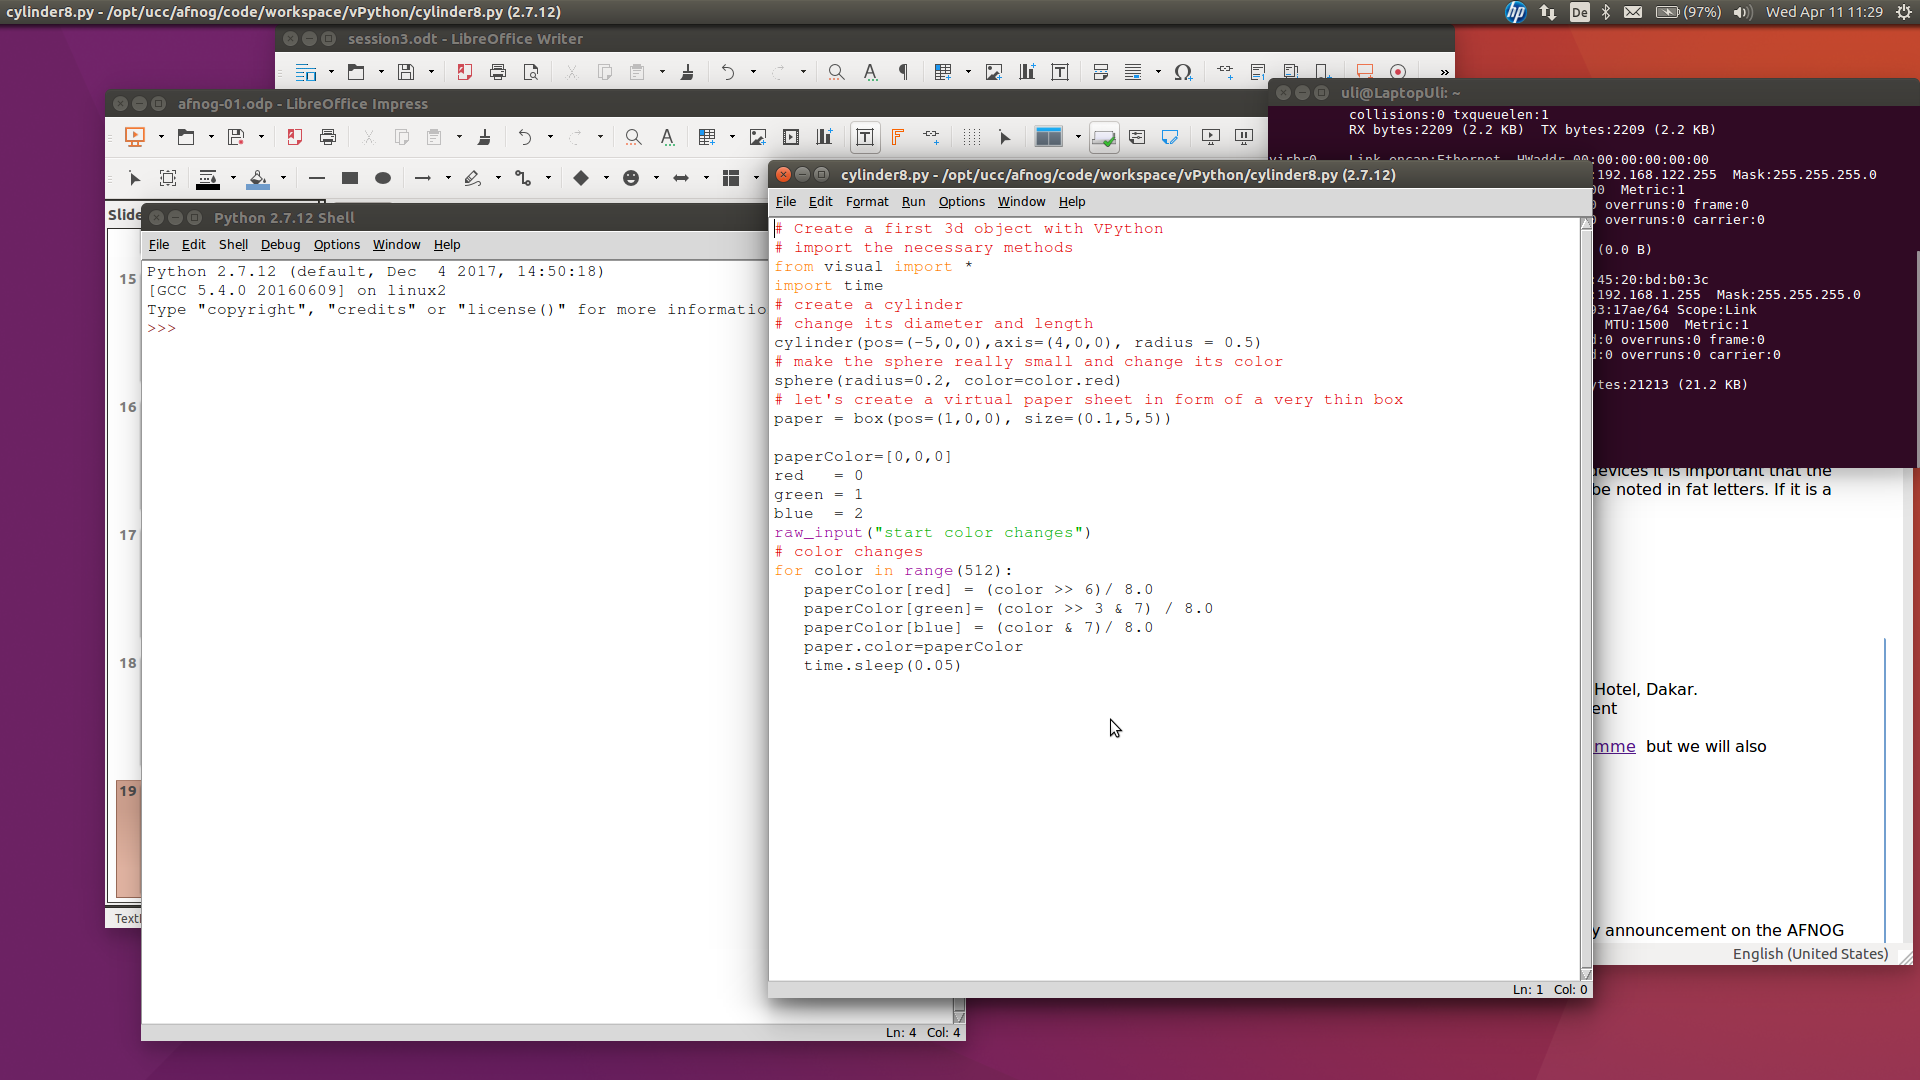
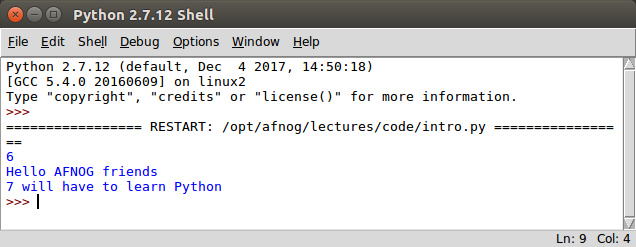
The same thing as a script in idle
Here you see the 2 idle windows. The top one contains the editor, the second the Python shell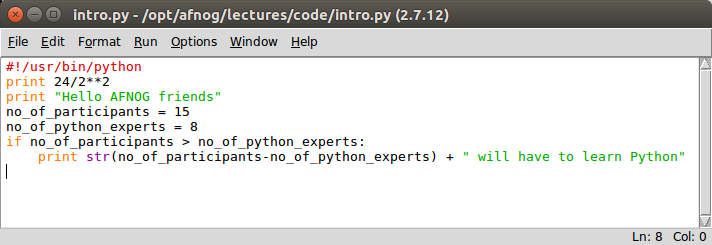
Slide 21: Running the Program
The script can berun from the Linux command shell with: python scriptName or we can make it executable and run it like we would run any compiled C program or any bash script: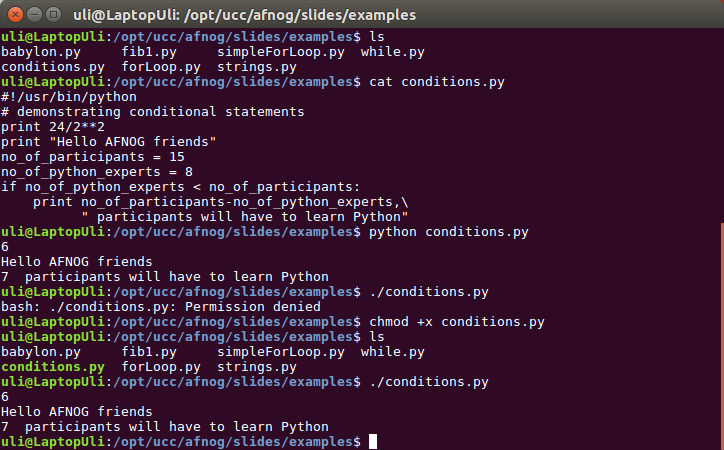
Slide 22: Very basic Introduction to Python
Assignments look pretty much the same as assignments in other programming languages. However, in Python you do not need to declare the variables. The interpreter finds the right type by itself. Here an example:
Slide 23: Strings in Python
Here some string examples: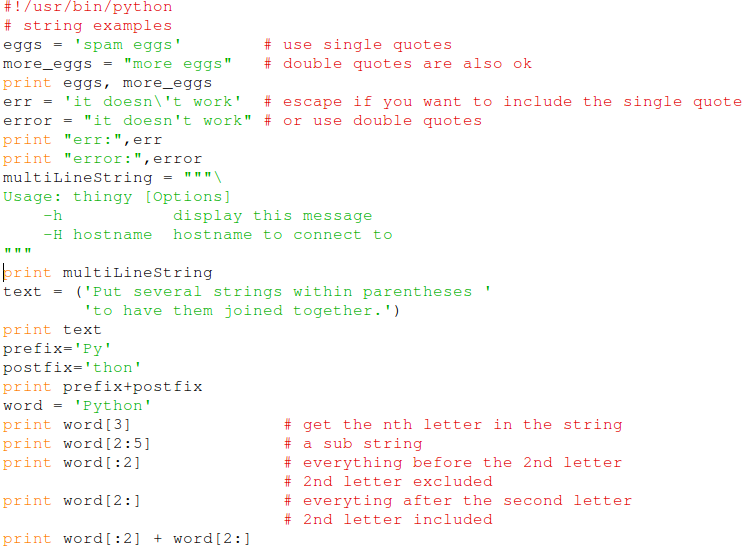
Slide 24: Conditions
We have seen conditions already in the very first example As you can see, there are no braces around the conditional block but it is indented
 # indicates an comment
In addition to the if statement above we have elif and else
Slide 25: while loop
Like in other programming languages we have different types of loops. Here is the example of a while loop which calculates the Fibonnaci series: This program uses multiple assignments a,b are assigned in the same line
Again you can see that the block starts with “:” and is indented.
Slide 26: Lists
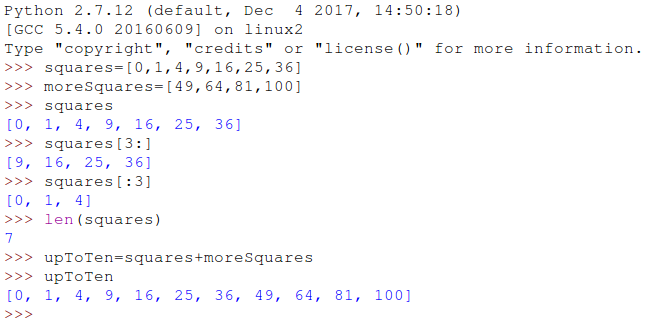
Python knows a number of compound data structure the most versatile of which is the list Lists may contain different data types but usually all members of lists have the same type. Lists have similar properties as strings:- define sub-lists
- get the length of lists
- concatenate lists
Slide 27: More data structures
Lists provide many different functions (methods) to operate on them: Append, extend, remove, pop, index, count, sort … Have a look at the tutorial for details The are also further complex data structures which we don’t have the time to go into:- tuples
- sets
- dictionaries
Slide 28: For loops
Lists are used in for loops. In Python the iterator can be of any type. Using the range function you can create the same type of for loops we know from C. Keywords like continue and break have the same meaning. pass does nothing and is used only where a statement is syntactically needed ... and the result:
Slide 29: Function Definition
Like in other high level languages you can create functions and call them later in your program
Slide 30: Modules
We may want to keep function definitions in separate files and use these definitions in several main programs. In our example of the Fibonacci numbers we can save the definitions in a file called fibo.py In order to use the definitions we must import them with import fibo In order to call the functions we have to all the module name: fibo.fib(20) or if we we want to import a single function: from fibo import fib fib(20) The module name is found in the variable __name__Slide 31: Module Example
 --
-- Comments
| I | Attachment | History | Action | Size | Date | Who |
Comment |
|---|---|---|---|---|---|---|---|
| |
RASPBERRY-PI-3_sml.jpg | r1 | manage | 300.6 K | 2018-04-24 - 17:49 | UliRaich | |
| |
assignment.png | r1 | manage | 15.9 K | 2018-04-24 - 19:42 | UliRaich | |
| |
babylon.py.txt | r1 | manage | 0.3 K | 2018-04-24 - 19:15 | UliRaich | |
| |
broadcom.png | r1 | manage | 52.9 K | 2018-04-24 - 18:38 | UliRaich | |
| |
cabling.png | r1 | manage | 1315.7 K | 2018-04-24 - 20:50 | UliRaich | |
| |
cobbler.png | r1 | manage | 23.8 K | 2018-04-24 - 19:10 | UliRaich | |
| |
cobblerPinout.png | r1 | manage | 281.5 K | 2018-04-24 - 20:50 | UliRaich | |
| |
conditions.png | r1 | manage | 19.3 K | 2018-04-24 - 19:47 | UliRaich | |
| |
conditions.py.txt | r1 | manage | 0.3 K | 2018-04-24 - 19:15 | UliRaich | |
| |
esp32.png | r1 | manage | 109.8 K | 2018-04-24 - 17:53 | UliRaich | |
| |
esp32price.png | r1 | manage | 172.0 K | 2018-04-24 - 17:49 | UliRaich | |
| |
fib1.py.txt | r1 | manage | 0.4 K | 2018-04-24 - 19:15 | UliRaich | |
| |
files.png | r1 | manage | 27.1 K | 2018-04-24 - 20:50 | UliRaich | |
| |
for.png | r1 | manage | 12.2 K | 2018-04-24 - 20:06 | UliRaich | |
| |
forLoop.py.txt | r1 | manage | 0.2 K | 2018-04-24 - 19:15 | UliRaich | |
| |
forResult.png | r1 | manage | 3.4 K | 2018-04-24 - 20:06 | UliRaich | |
| |
functionDef.png | r1 | manage | 24.4 K | 2018-04-24 - 20:09 | UliRaich | |
| |
idle.png | r1 | manage | 317.8 K | 2018-04-24 - 19:31 | UliRaich | |
| |
lists.png | r1 | manage | 35.0 K | 2018-04-24 - 19:54 | UliRaich | |
| |
m6800.png | r1 | manage | 26.3 K | 2018-04-24 - 17:49 | UliRaich | |
| |
moduleCall.png | r1 | manage | 13.0 K | 2018-04-24 - 20:50 | UliRaich | |
| |
moduleCallResult.png | r1 | manage | 17.3 K | 2018-04-24 - 20:50 | UliRaich | |
| |
moduleRun.png | r1 | manage | 14.2 K | 2018-04-24 - 20:50 | UliRaich | |
| |
modules.png | r1 | manage | 30.8 K | 2018-04-24 - 20:14 | UliRaich | |
| |
pythonBash.png | r1 | manage | 108.7 K | 2018-04-24 - 19:42 | UliRaich | |
| |
pythonInterpreter.png | r1 | manage | 38.8 K | 2018-04-24 - 19:31 | UliRaich | |
| |
pythonScript.png | r1 | manage | 35.3 K | 2018-04-24 - 19:31 | UliRaich | |
| |
pythonShell.png | r1 | manage | 32.4 K | 2018-04-24 - 19:31 | UliRaich | |
| |
remoteDesktop.png | r1 | manage | 378.8 K | 2018-04-24 - 18:47 | UliRaich | |
| |
simpleForLoop.py.txt | r1 | manage | 0.2 K | 2018-04-24 - 19:15 | UliRaich | |
| |
ssh.png | r1 | manage | 293.5 K | 2018-04-24 - 18:47 | UliRaich | |
| |
strings.png | r1 | manage | 77.6 K | 2018-04-24 - 19:46 | UliRaich | |
| |
strings.py.txt | r1 | manage | 1.0 K | 2018-04-24 - 19:15 | UliRaich | |
| |
twiki.png | r1 | manage | 373.8 K | 2018-04-25 - 07:26 | UliRaich | |
| |
while.png | r1 | manage | 7.6 K | 2018-04-24 - 19:54 | UliRaich | |
| |
while.py.txt | r1 | manage | 0.1 K | 2018-04-24 - 19:15 | UliRaich |
Ideas, requests, problems regarding TWiki? Send feedback


