Accessing the Python interpreter
MicroPython
MicroPython implements the Python 3.4 syntax. It is Open Source and can be downloaded from its GitHub repositoryAccessing the interpreter though the serial line
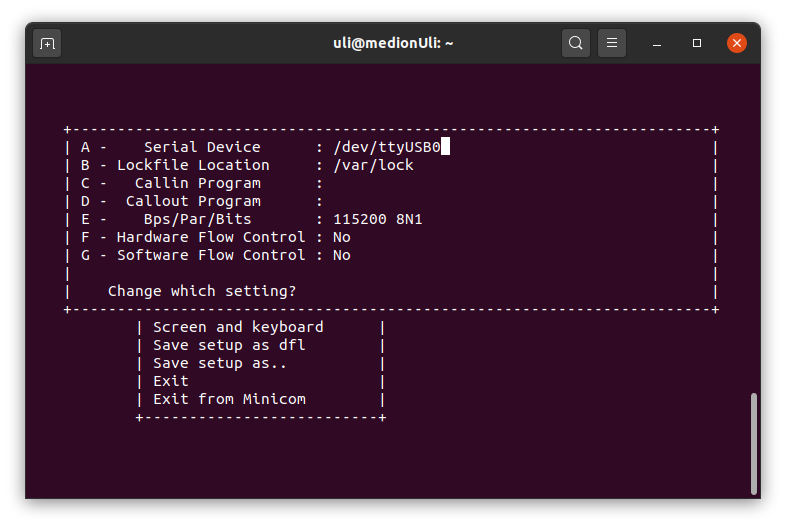
In order to connect to the ESP32 we need a serial terminal emulator like minicom, gtkterm or seyon. Later on we will use thonny as an editor to write our Python scripts and save them on the PC but also to connect to the ESP32 through thonny's command window. Here I give you an example how to configure minicom for use with MicroPython on the ESP32. First you must start minicom as root with the option "-s":minicom -s

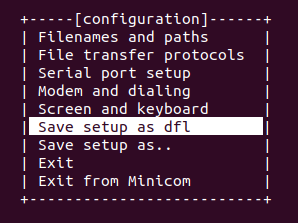
Then you can save these settings as default when starting minicom.
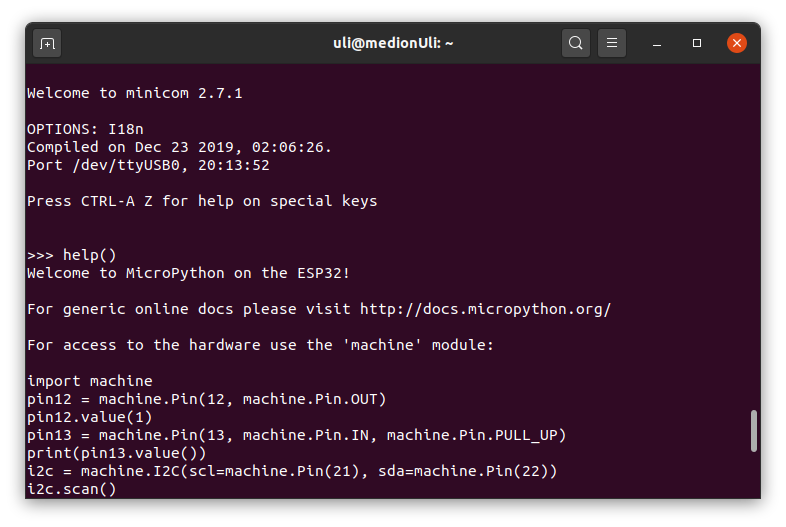
 Finally you can start minicom normally without any options and you will see that MicroPython says "hello" with its characteristic prompt: ">>>".
In the screen dump below I typed the command
help()and you see the first part of MicroPythons answer.
 Now you can interact with MicroPython through its Read, Evaluate, Print Loop (REPL). Here a simple example:
 --
-- Comments
| I | Attachment | History | Action | Size | Date | Who | Comment |
|---|---|---|---|---|---|---|---|
| |
esp32_erase.sh | r1 | manage | 0.2 K | 2020-05-07 - 10:01 | UliRaich | |
| |
esp32_flash.sh | r1 | manage | 0.2 K | 2020-05-07 - 09:58 | UliRaich | |
| |
firmware.bin | r2 r1 | manage | 1457.6 K | 2020-05-23 - 10:36 | UliRaich | |
| |
microPythonSession.png | r1 | manage | 60.7 K | 2020-04-25 - 19:46 | UliRaich | |
| |
minicomConfig.png | r1 | manage | 43.0 K | 2020-04-25 - 18:28 | UliRaich | |
| |
minicomHelp.png | r1 | manage | 57.7 K | 2020-04-25 - 18:28 | UliRaich | |
| |
minicomSave.png | r1 | manage | 15.1 K | 2020-04-25 - 18:28 | UliRaich |
This topic: IoT_Course_English > WebHome > AccessingThePythonInterpreter
Topic revision: r5 - 2021-07-26 - UliRaich
Ideas, requests, problems regarding TWiki? Send feedback

