Difference: HardwareAccessAndMicropython (6 vs. 7)
Revision 72019-06-11 - UliRaich
| Line: 1 to 1 | ||||||||
|---|---|---|---|---|---|---|---|---|

Slide 1: Setting up and IoT | ||||||||
| Line: 42 to 42 | ||||||||
How to program the processor | ||||||||
| Changed: | ||||||||
| < < |
| |||||||
| > > |
| |||||||
Flashing the code | ||||||||
| Line: 53 to 53 | ||||||||
esptool
| ||||||||
| Changed: | ||||||||
| < < |
| |||||||
| > > |
| |||||||
| In the above cases the use of esptool is hidden to us. We can however also execute esptool directly. | ||||||||
| Line: 149 to 149 | ||||||||
| It is written in PyQt4 the Python language binding to Qt4. | ||||||||
| Changed: | ||||||||
| < < | The Linux version did not work for me | |||||||
| > > | The Linux version did not work for me when running Ubuntu 18.04 or later. | |||||||
| I found a version based on PyQt5 (new version of QT) which was even worse. | ||||||||
| Line: 251 to 251 | ||||||||
| ||||||||
| Changed: | ||||||||
| < < |
| |||||||
| > > |
| |||||||
| Changed: | ||||||||
| < < | WS2812B timing | |||||||
| > > | WS2812B timing | |||||||
|
For all the details on the ws2812b look at https://cdn-shop.adafruit.com/datasheets/WS2812B.pdf | ||||||||
| Line: 268 to 268 | ||||||||

| ||||||||
| Changed: | ||||||||
| < < | Cascading the WS2812B | |||||||
| > > | Cascading the WS2812B | |||||||
|
| ||||||||
| Line: 371 to 371 | ||||||||
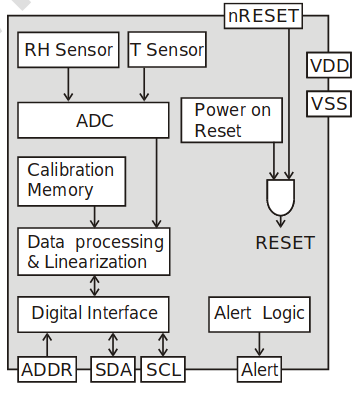
The SHT30 digital temperature and relative humidity sensor | ||||||||
| Changed: | ||||||||
| < < | The SHT30 is a digital temperature and humidity sensor based on the I2C bus | |||||||
| > > | The SHT30 is a digital temperature and humidity sensor based on the I2C bus | |||||||
|
Here is its data sheet Temperature precision: +- 0.3 °C Relative humidity: +- 3 % Works on 2.4V – 5.5 V  | ||||||||
| Line: 398 to 398 | ||||||||
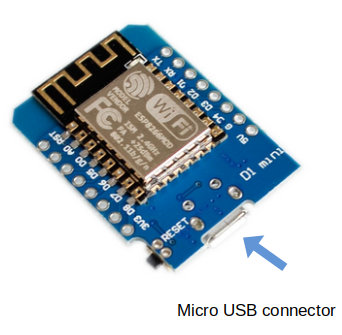
While for the course we only use the CPU and 2 sensor shields:
| ||||||||
| Changed: | ||||||||
| < < |
| |||||||
| > > |
| |||||||
| there are many more available on the market. We have a dozen such shields here for demo. All demo programs can be found at: https://github.com/uraich/MicroPython_IoTDemos | ||||||||
View topic | History: r7 < r6 < r5 < r4 | More topic actions...
Ideas, requests, problems regarding TWiki? Send feedback
