Communicating over MQTT
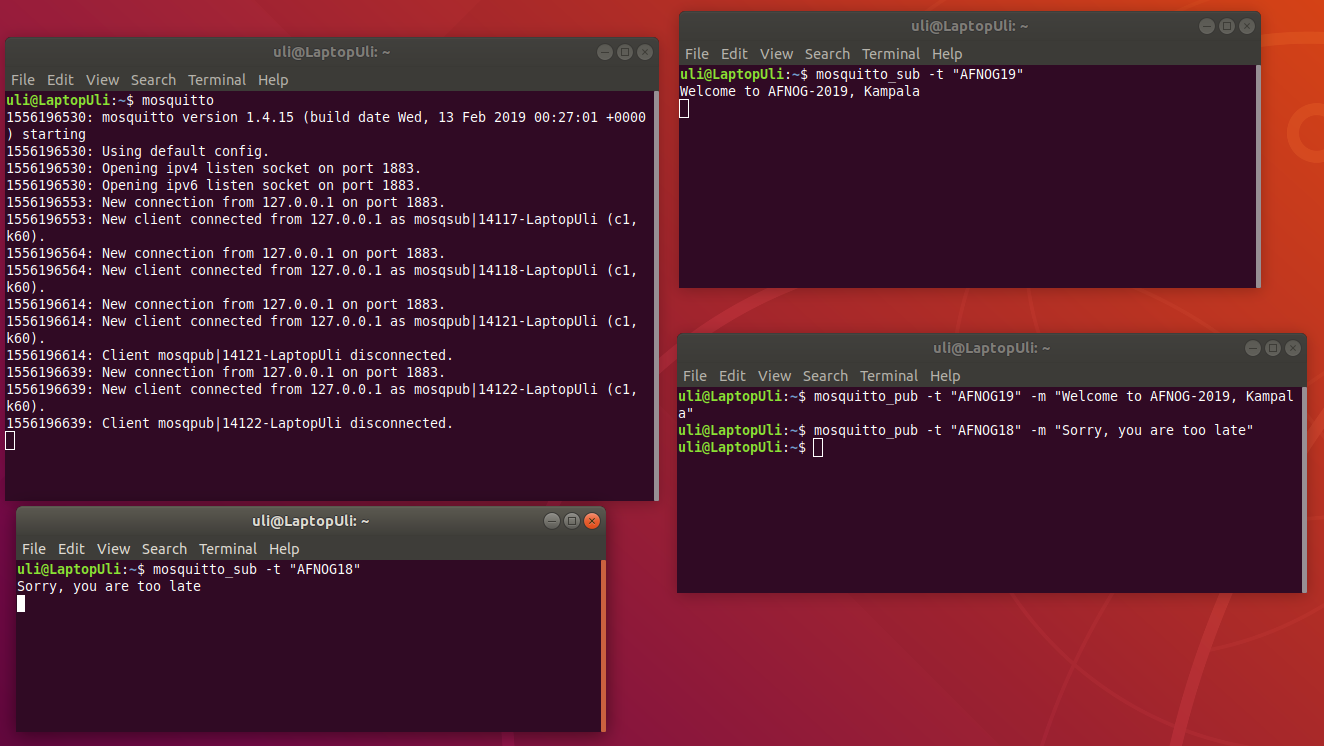
MQTT, the Message Queuing Telemetry Transport protocol is the communication protocol of choice in many IoT applications. It uses a broker receiving subscriptions and publications, distributing messages on a certain topic to everybody subscribed to it. It is a light weight protocol running of top of TCP.
MQTT and Cayenne
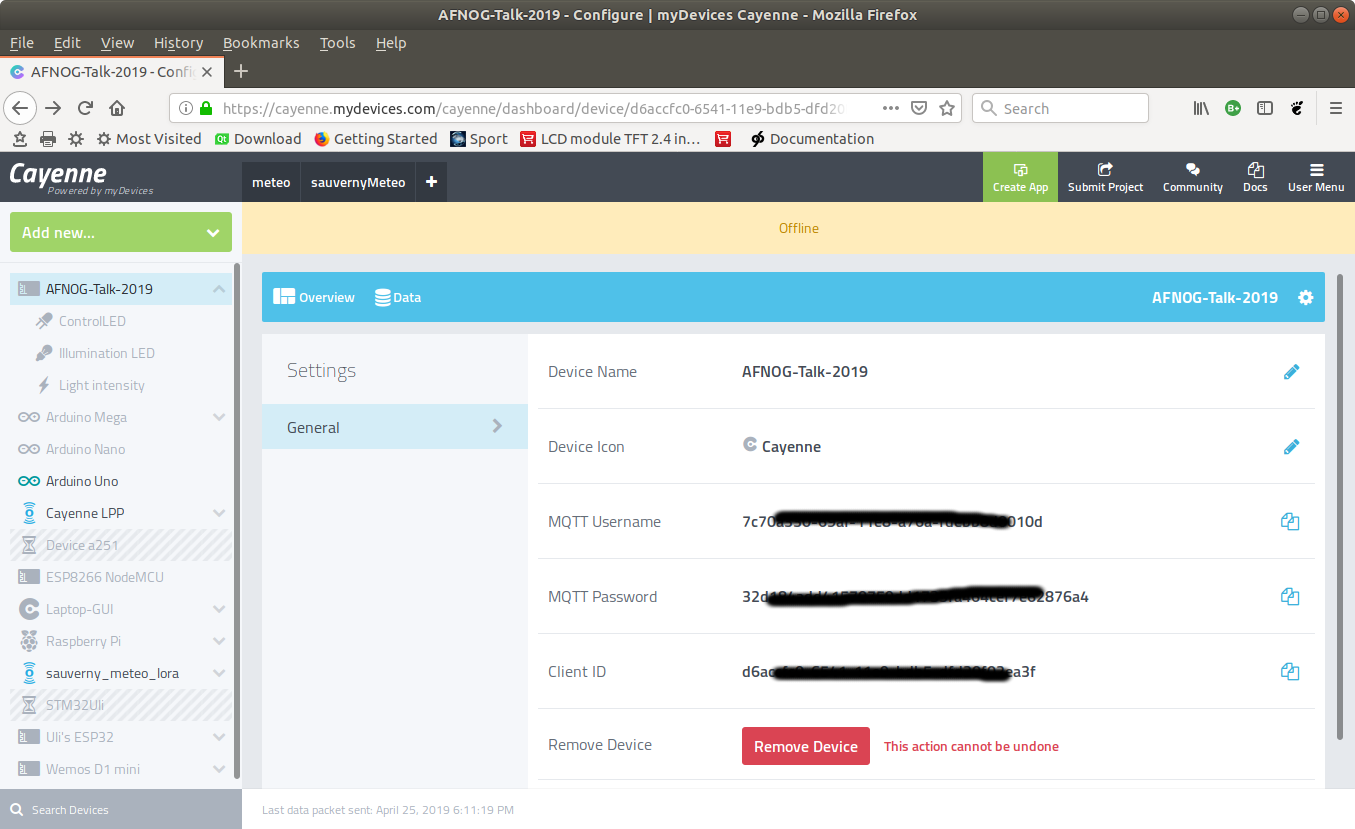
Cayenne supplies an mqtt broker at mqtt.mydevices.com which uses a strict format for the topic and the payload string. When registering at MyDevices Cayenne Cayenne uses these credentials in the MQTT topic to verify permission to access the MQTT broker. A typical publication topic has the form:
v1/username/things/clientID/data/channel
while the payload has the form:
type, unit=value (e.g. temp,c=24.5 to publish a temperature reading of 24.5 °C)
For the full details please refer to the Cayenne MQTT API
Cayenne uses these credentials in the MQTT topic to verify permission to access the MQTT broker. A typical publication topic has the form:
v1/username/things/clientID/data/channel
while the payload has the form:
type, unit=value (e.g. temp,c=24.5 to publish a temperature reading of 24.5 °C)
For the full details please refer to the Cayenne MQTT APIThe example program
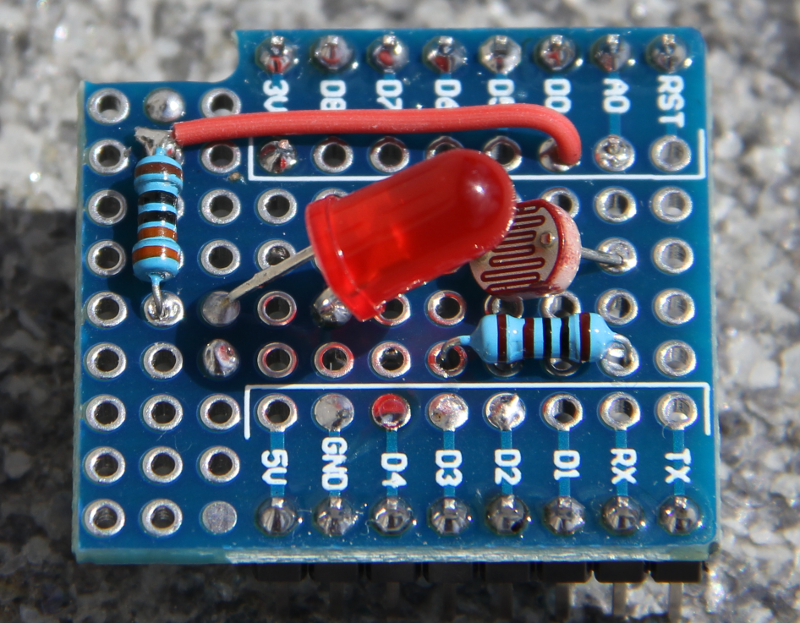
The example program uses hardware prepared for a simplistic demonstration IoT. It consists of a photo-resistor in series with a 1kOhm resistor forming a voltage divider. The voltage over the photo-resistor, changing with changing light intensity, is measured with the 10 bit ADC available on the ESP8266 and accessible on the A0 pin of the WeMos D1 mini CPU card. The measured voltage is published on channel 1. In addition to the photo-resistor we have an LED shining on the photo-resistor. This LED is connected to D0 on the WeMos D1 mini corresponding to GPIO 16 and can be controlled on channel 2. Finally the built-in LED on the CPU card, connected to D4 or GPIO 2 can be controlled through channel 3. --
-- Comments
| I | Attachment | History | Action | Size | Date | Who | Comment |
|---|---|---|---|---|---|---|---|
| |
__init__.py.txt | r1 | manage | 0.1 K | 2019-04-25 - 18:39 | UliRaich | |
| |
cayenneCredentials.png | r1 | manage | 144.1 K | 2019-04-25 - 18:23 | UliRaich | |
| |
clientPublic.py.txt | r1 | manage | 11.7 K | 2019-04-25 - 19:11 | UliRaich | |
| |
ledControlPublic.py.txt | r1 | manage | 2.2 K | 2019-04-25 - 18:56 | UliRaich | |
| |
mqttDemo.png | r1 | manage | 191.3 K | 2019-04-25 - 16:33 | UliRaich | |
| |
proto.png | r1 | manage | 882.8 K | 2019-04-25 - 19:20 | UliRaich |
Ideas, requests, problems regarding TWiki? Send feedback


