Exercises on Sensor and Actuator access
Introduction
Once we are comfortable with Python basics we can try to access the sensors and actuators connected to our Raspberry Pi. In case of this tutorial interfacing is exceedingly simple: All devices are connected through simple GPIO (General Purpose IO) lines, which we can program to be either input or output and to/from which we can read/write logic levels.Exercise Session 2
Hardware access
1. First try on the LED
Plug the KY-016 LED into the bread board. Connect the GND pin to ground and connect the r(Red) pin to 3-3 V. The LED should light up in red. Try the same thing with the g(Green) and b(Blue) pins.2. A first program to light the LED
Connect the r,g,b pins to the GPIO pins 18,17,22 respectively. Does the LED light up? Write a python program that switches the red LED on and another one to switch it off and finally a third program to blink it with a frequency of 1 Hz. In order to accomplish this you must:-
make sure that the pigpiod daemon is running ( use ps ax | grep pigpiod to check)
-
In your program you must import the pigpio module and create a pi object:
import pigpio
pi = pigpio.pi()
This establishes the link of your program with the daemon -
set the gpio mode to output:
_RED = 18 # the red pin is connected to GPIO 18
pi.set_mode(_RED,pigpio.OUTPUT) -
and finally write a value to the GPIO pin:
pi.write(_RED,pigpio.HIGH) # or pigpio.LOW -
if you also import the module time then you can use its method sleep, to wait for 0.5 s
time.sleep(0.5)
3. Try all basic colors
Loop over a 3 bit number (0..7) to show all basic colors. Bit 0 of the number corresponds to the red, bit 1 to the green and bit 2 to the blue component. Display each color for 1 s.4. PWM
For each basic color (r,g,b) run through color intensities from 0 .. 255 with PWM: pi.set_PWM_ductycycle varies the color intensity. Display each color for 50 ms.5. Reading the HC-SR04
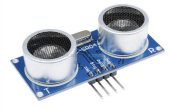
The HC-SR04 ultrasonic distance sensor uses 5 pins which must be connected as shown in this table:
| Vcc | 5V |
| Trig | 5 |
| Echo | 6 |
| GND | GND |
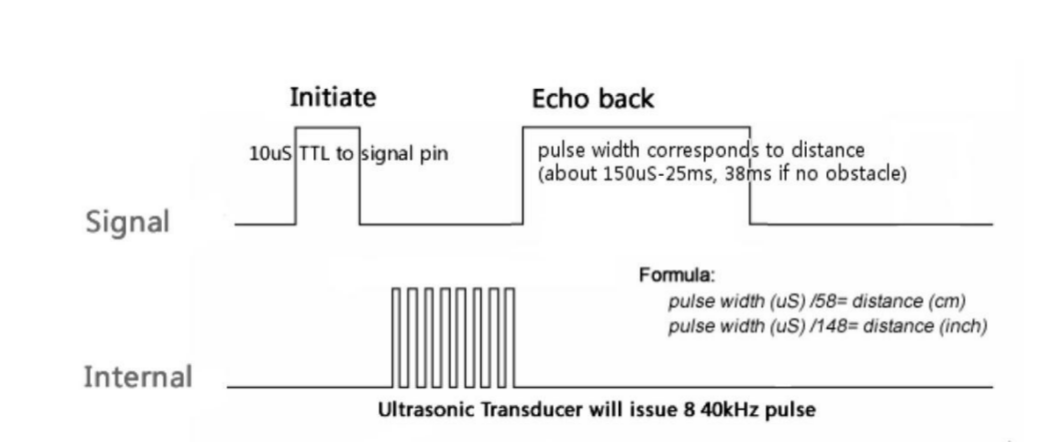
 The simplest way to read the sensor is by setting the Trig signal high (pi.write(_TRIG,pigpio.HIGH)) waiting 10 µs (time.sleep(0.00001) before setting it low again.
Then we must read the echo signal, set startTime to the current time when the signal goes high and setting stopTime to the current time when the echo signal goes low again:
while pi.read(_ECHO)==0:
The simplest way to read the sensor is by setting the Trig signal high (pi.write(_TRIG,pigpio.HIGH)) waiting 10 µs (time.sleep(0.00001) before setting it low again.
Then we must read the echo signal, set startTime to the current time when the signal goes high and setting stopTime to the current time when the echo signal goes low again:
while pi.read(_ECHO)==0:startTime = time.time() while pi.read(_ECHO)==1:
stopTime = time.time() The travelTime is then stopTime – startTime and the distance traveled: soundSpeed = 34300 # speed of sound in air [cm / s] distance = travelTime * soundSpeed / 2
# the sound travels to the obstacle and back Write the readout program for the HC-SR04 and test it. You may run into a problem that the program blocks from time to time. Any idea why? 1
6. Callbacks
Re-write the program using callbacks. Implement it as a class with a read method that triggers the measurements and returns the result.
1 Raspbian is a multi-tasking program and treats regular interrupts (time, SD card, keyboard …) It may happen that an interrupt arrives when the echo signal changes state and this is then not seen by our program. Either we include a timeout (restart the measurement cycle when we have to wait too long for the transition to occur) or, better, use callbacks to observe the transitions
-- Comments
| I | Attachment | History | Action | Size | Date | Who | Comment |
|---|---|---|---|---|---|---|---|
| |
fullColors.py.txt | r1 | manage | 0.7 K | 2018-04-25 - 11:58 | UliRaich | |
| |
hc-sr04.png | r1 | manage | 24.1 K | 2018-04-25 - 11:41 | UliRaich | |
| |
hc-sr04Timing.png | r1 | manage | 92.0 K | 2018-04-25 - 11:45 | UliRaich | |
| |
rgbColorIntensities.py.txt | r1 | manage | 1.0 K | 2018-04-25 - 11:58 | UliRaich | |
| |
rgbLED.py.txt | r1 | manage | 0.7 K | 2018-04-25 - 11:58 | UliRaich | |
| |
rgbLED.tar.gz | r1 | manage | 0.7 K | 2018-04-25 - 11:58 | UliRaich |
Topic revision: r3 - 2018-08-23 - IsaacArmahMensah
Ideas, requests, problems regarding TWiki? Send feedback


