Exercise 15: EEPROM and Driver Access
Goal:
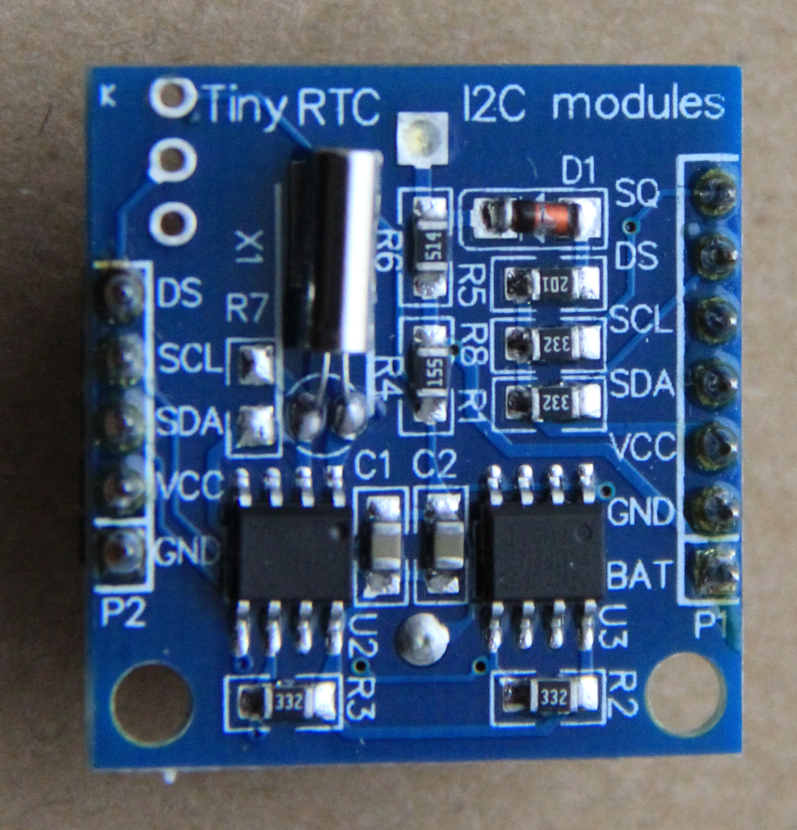
The goal of this exercise is twofold: First we will learn about an EEPROM, a Electrically Erasable Read Only Memory. These devices are often used in instruments to store calibration values or configuration parameters. EEPROMs can usually be read byte by byte but can be erased and written only in blocks. The at24c32 EEPROM is mounted together with the DS1307 RTC on the Tiny RTC module (chip on the right). The Tiny RTC module therefore responds to 2 I2C addresses. You find these 2 addresses with the i2cdetect command and you can figure out from the data sheets which of the addresses corresponds to which chip. The data sheet for the at24c32 can be found here: http://www.atmel.com/Images/doc0336.pdf
Examination exercises
For the examination please solve exercise 1-3 of this exercise list. Exercise 4 is not part of the examination! For all three exercises, write- the C code
- a Makefile
- a shell script that sets up the LD_LIBRARY_PATH to include /opt/ucc/lib, such that the at24c32 library can be found (not necessary of course if you do not use the at24c32 library)
- a short description on how you designed the program and what the individual steps are that the program takes to solve the problem.
Exercise 1: Read the EEPROM
The at24c32 is a 32 kBit device and can therefore store a total of 4096 bytes (4096 * 8 = 32 kBit). Like the DAC it is an I2C device. To make things easier for you, again a library is supplied. The documentation of the library is again generated from the source code and can be found at the URL: https://dcsit.twiki.ucc.edu.gh/html/libDoc/at24c32Exercise 2: Re-write the program without using the library
Since there are only very few library calls it is also possible to access the EEPROM through pigpio calls avoiding my library all together. Make sure you get the same result as in the first exercise.Exercise 3: Write the EEPROM
Prepare a buffer with some data to be written to the EEPROM. Use your previous program to read these data back. Power down the Raspberry Pi, wait a minute and then switch it back on again. Verify that you can still read back the data. The pdf of the examination exercises are found here: https://iotworkshop.africa/pub/Embedded_Systems/I2CEEProm/csc_exam.pdf It is possible to access the I2C driver directly and it was my intention to show you how to do this. Unfortunately we did not make it up a level where we can understand how a device driver works. The following exercises it there not part of the examination exercises!Exercise 4: Write an access library
The full description on how to access I2C devices through the driver directly is found here.-
at24c32Open
-
at24c32Close
-
at24c32Read
-
at24c32Write
-
at24c32Debug (switching debugging information on or off)
Comments
| I | Attachment | History | Action | Size | Date | Who | Comment |
|---|---|---|---|---|---|---|---|
| |
csc_exam.pdf | r1 | manage | 1692.7 K | 2017-11-29 - 16:03 | UnknownUser | |
| |
rtc.png | r1 | manage | 1118.1 K | 2017-10-25 - 18:06 | UnknownUser | |
| |
session_14.odt | r1 | manage | 1142.5 K | 2017-11-21 - 16:49 | UnknownUser |
Ideas, requests, problems regarding TWiki? Send feedback


