Implementing the Arduino toolbox
The program structure
As you would probably expect, the program will consist of three parts- a server running on the Arduino taking commands from Xcos and accessing the GPIO hardware
- an Xcos client implementing the Xcos blocks
- a protocol defining the communication between client and server
Setting the analogue reference and getting the server version
R0: sets the analogue reference to defaultR1: sets the analogue reference to internal
R2: sets the analogue reference to external
R3: gets the server version code. The server answers with Vx where x is the version number e.g. V4 for version 4
Reading or writing a digital GPIO line
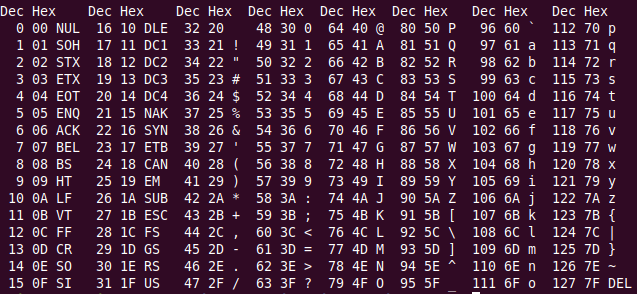
Dan0 or Dan1: attaches GPIO line n. The last character defines if the line in input (0) or output (1). n is the GPIO pin number which can be '1' (0x31) up to '9' (0x39). For higher pin numbers just take the next ASCII characters. Having a look at the ASCII table tells us the pin number 10 will correspond to the ASCII characters with code (0x3A) which is ':', 11 corresponds to ';' and so on.Drn: Read the state of GPIO line n
Dwn0 or Dwn1 sets the GPIO line n to 0 or 1 respectively.
 With this information it is possible to develop the first version of the Arduino server. Since all it needs is input from the serial line we can write a simple C program to test the server. A program asking for the server version (and printing it) as well as the Arduino server are attached to this TWiki page.
The Arduino server uses debugging code which prints each character received as well as the interpretation in makes out of it to a Softserial port with Rx connected to GPIO pin 11 and Tx connected to pin 10. This Softserial port can be attached to a USB to serial adapter and the output observed with a serial emulator program like minicom. The communication between Scilab and the Arduino happens on /dev/ttyUSB0, the debugging port should therefore be connected to /dev/ttyUSB1 (minicom -D /dev/ttyUSB1).
Here is a screen dump of the server output when we first read the server version and then blink the builtin LED 5 times:
 --
-- Comments
Ideas, requests, problems regarding TWiki? Send feedback


