The Robot
The robot consists of a 3 wheel chassis where 2 wheels are driven by DC motors. It is controlled by an Arduino Uno and contains an ultrasonic distance sensor mounted on a servo motor. The sensor can be we turned with the servo motor looking into different directions such that the robot can decide which way is free.
The robot was bought in China for a mere 20 US$ including the Arduino Uno control unit with USB cable for connection to the PC for programming, the
L298N
motor control unit, driving the DC motors and the servo motor for the ultra-sonic sensor as well as the Arduino sensor shield. In addition the kit includes a battery holder and a power switch such that the robot can work autonomously.
The Arduino and the sensor shield can also be used for readout and control of the sensors in the sensor kit, which we bought for control by the Raspberry Pi. The Arduino however needs its own software development kit (SDK) installed on the PC for development of the
robot software.
Assembling the chassis
As with most of the devices I bought in China, the kit came without any documentation. Not even assembly instructions for the mechanical parts are available. I was pretty lucky to find 2 Youtube videos showing how to assemble the device:
https://www.youtube.com/watch?v=p8PouSmxOQY
shows how to mount the motors and the front wheel while
https://www.youtube.com/watch?v=Uf9Gs7sSlQs
, even though made for the 4 wheel robot chassis, shows how to mount the distance sensor onto the servo motor and how to fix the servo motor to the chassis.
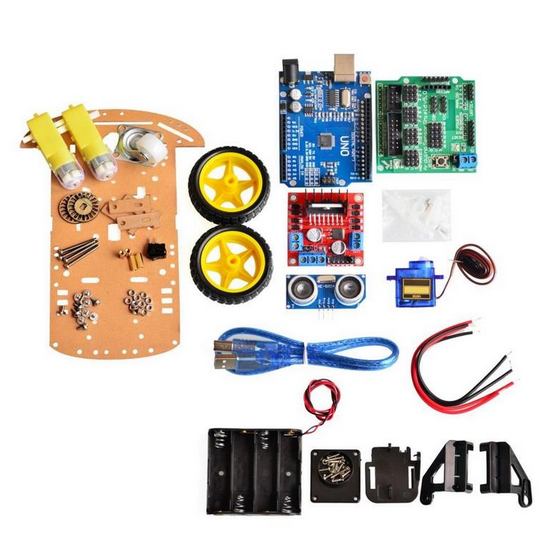
Here is a photo of the all the parts:
Before assembling anything you should solder the red and black wires to the 2 stepper motors driving the wheels. They are easier to solder before the motor is mounted. Then you mount the motor using the 2 semi-transparent plastic pieces and 2 long screws as shown in the photo:
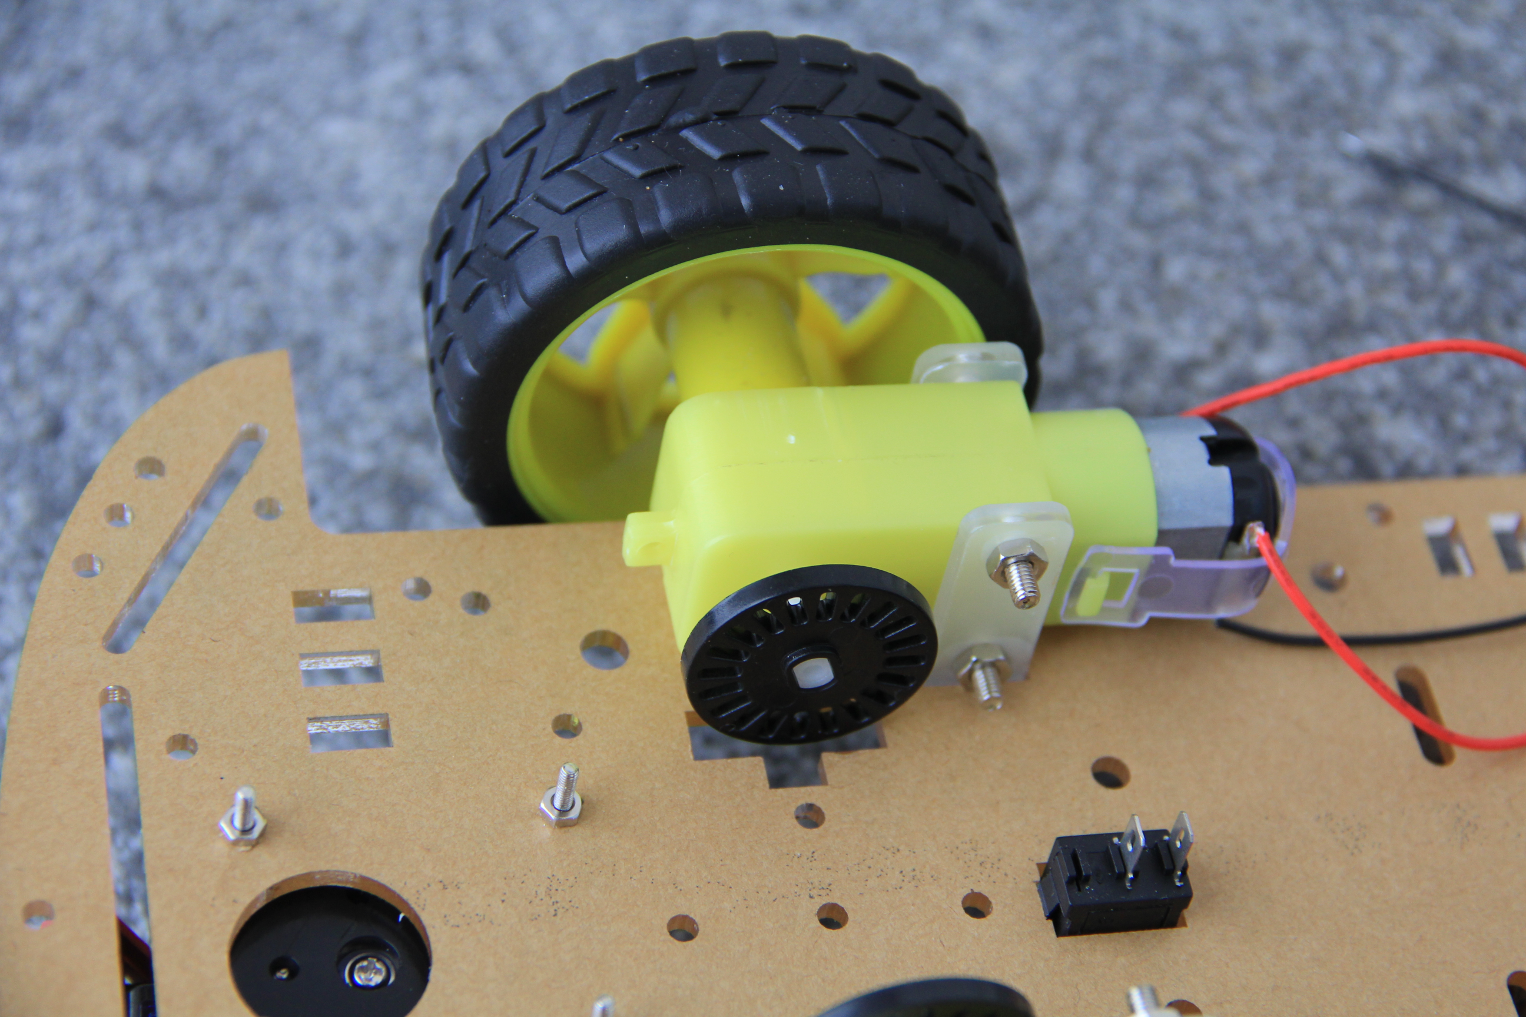
Here the wheel and the encoder wheel are already mounted on the motor. The encoder wheel needs additional sensors, not included in the kit, to be made functional. The back wheel is mounted with 4 distance pieces as shown:
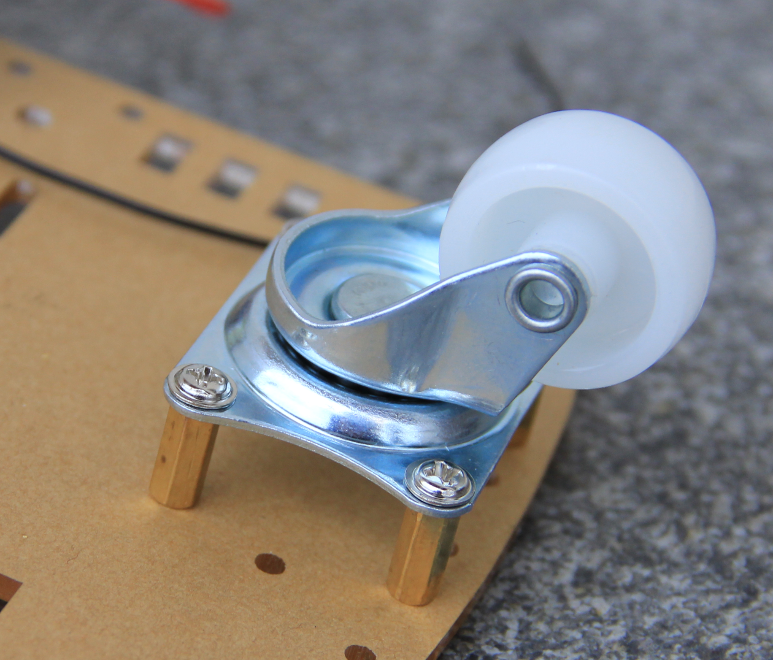
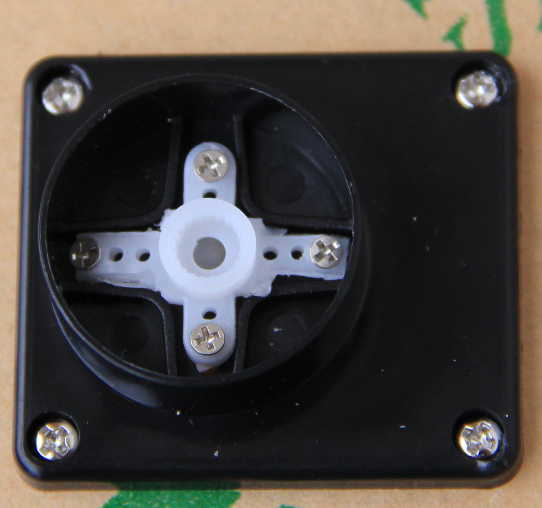
The most tricky part is the assembly of the ultra-sonic distance sensor onto the servo-motor. First you have to screw the small white cross into the round plastic socket. The cross is by far to big and needs to be cut in order to fit into the socket.
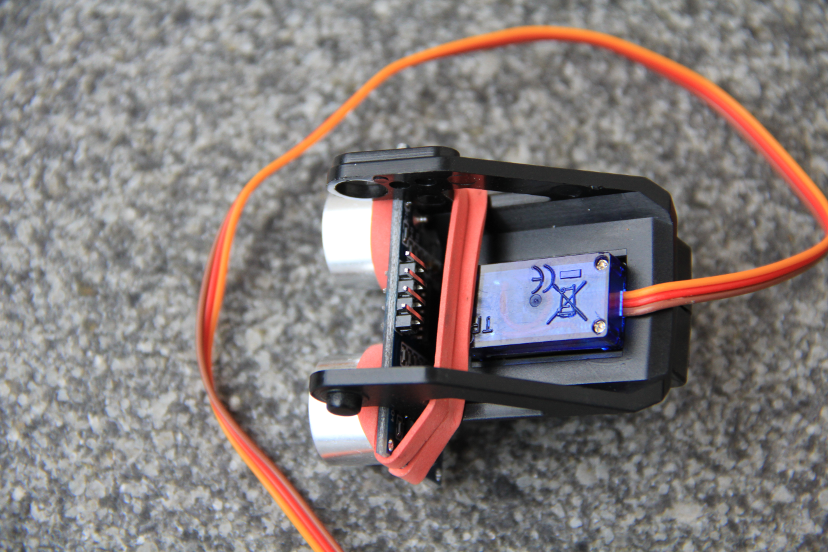
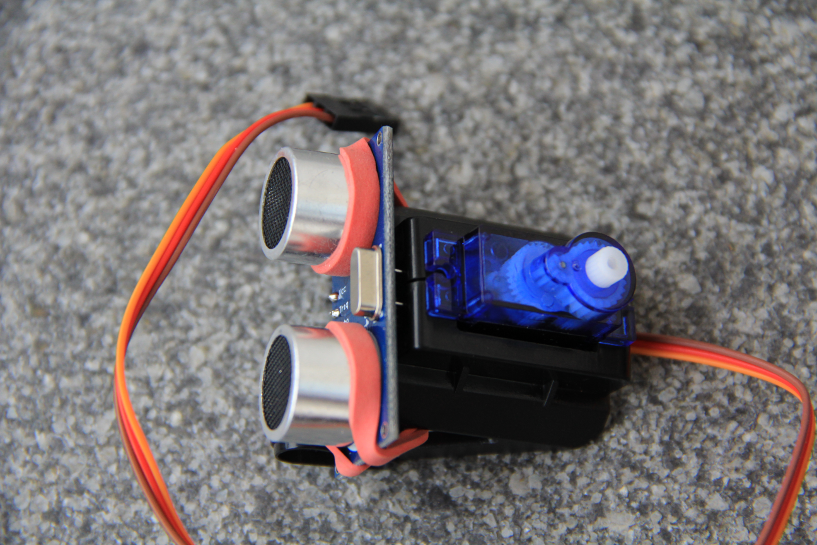
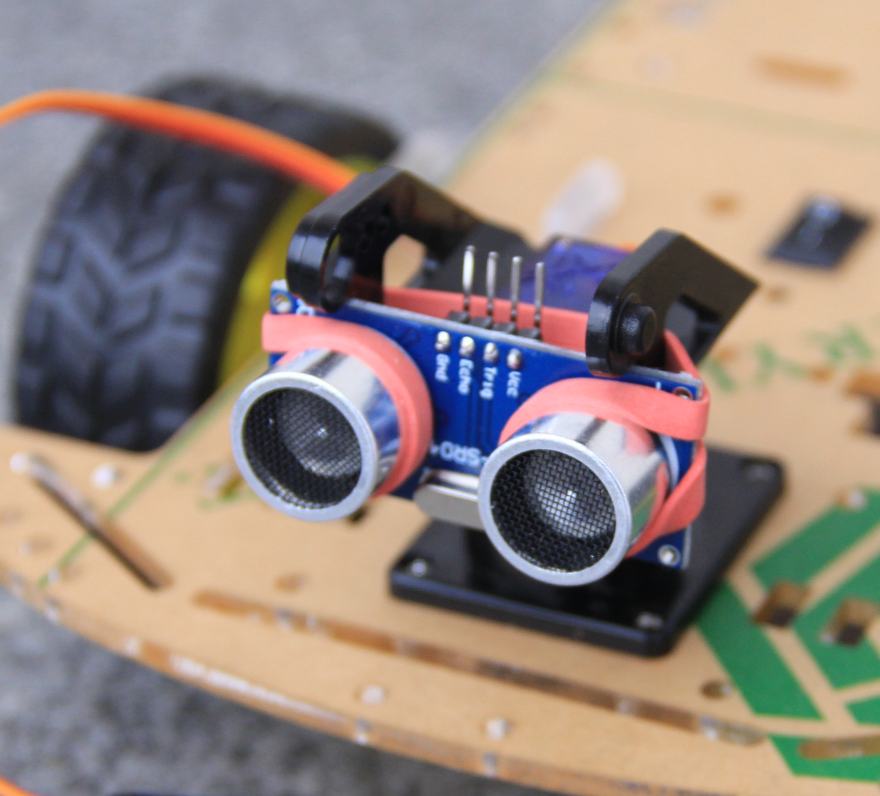
Finally we mount the servo motor upside down, the white turning axis into the receiving cross (see photo above left) and screw it with the flat cutting screw (from below of what is seen in the photo above left). Finally we mount the base with the servo mounted on top onto the chassis and fix the sensor with a rubber band:
There is not much real estate on the chassis itself to mount the Arduino controller and the motor driver. Therefore I added a level with a small plexiglass sheet onto which I mounted the PCB board. This is how the complete assemble looks like:
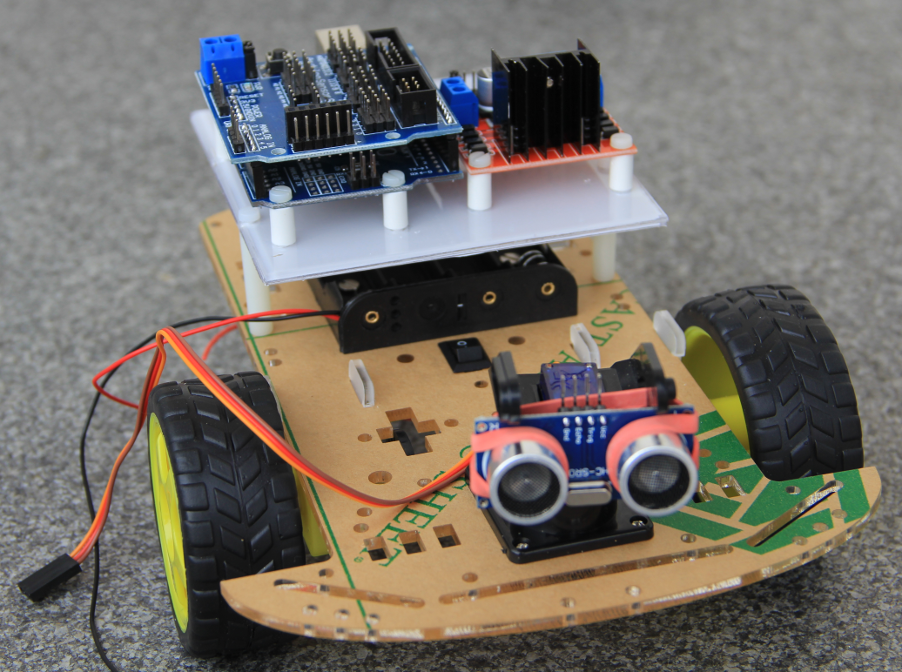
Setting up the software
To make sure I have the latest and greatest software I download the sources via git to /opt/ucc/micros/arduino:
git clone
https://github.com/arduino/Arduino.git
Then cd into build and build the whole thing:
ant dist ant run
I get this error:
linux64-start:
[exec] Picked up JAVA_TOOL_OPTIONS:
[exec] Exception in thread "main" java.lang.UnsupportedClassVersionError: processing/app/Base : Unsupported major.minor version 52.0
[exec] at java.lang.ClassLoader.defineClass1(Native Method)
[exec] at java.lang.ClassLoader.defineClass(ClassLoader.java:803)
[exec] at java.security.SecureClassLoader.defineClass(SecureClassLoader.java:142)
which I can get rid of by choosing the right java version:

Now the SDK runs but I get a library error:
linux64-start:
[exec] Picked up JAVA_TOOL_OPTIONS:
[exec] Invalid library found in /opt/ucc/micros/arduino/Arduino/build/linux/work/libraries/Firmata-2.5.4: /opt/ucc/micros/arduino/Arduino/build/linux/work/libraries/Firmata-2.5.4
The reason is that Firmata-2.5.4 is empty. I delete Firmata-2.5.4, rename Firmata to Firmata-2.5.4 and create a symbolic link Firmata → Firmata-2.5.4, which solves the problem.
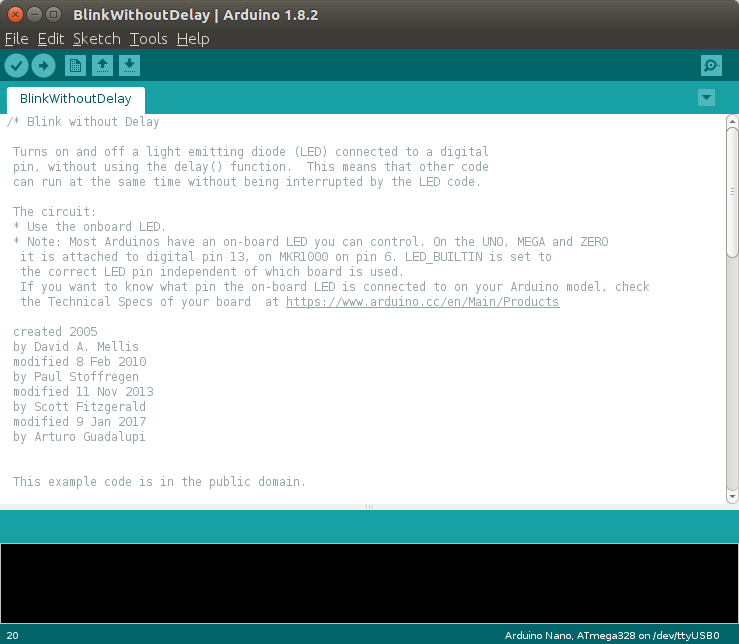
Finally I execute install.sh to get the desktop file which I install in the Unity task panel. This is how the SDK looks like on the screen:
Here are some pages on the
robot software
--
 Uli Raich - 2017-01-24
Comments
Good afternoon sir. I have been trying to install the SDK but I get an error when I run the install.sh I have searched online for solutions but I can't find any. I really need your help. Attached is a screenshot of the error.Thank you.
--
 Enoch Sowah - 2017-03-19
The SDK launches when I execute the 'ant run' command but I get the error when I run the install.sh file
--
 Enoch Sowah - 2017-03-19
Good day sir! I have the same issues when i run the install.sh. We need your help on that. But there is a new upgrade with the packages because the firmata2.5.4 has change to firmata2.5.5 in out directory and that is generated automatically after we issue the command ant dist
--
 John Aubyn - 2017-03-19
I'm pretty sure the upgrade is the cause of the problem
--
 John Aubyn - 2017-03-19
After compiling the Arduino SDK, can you run it at /opt/ucc/micros/arduino/arduinoSDK/build/linux/work/arduino ?
I have my desktop file installed in $HOME/.local/share/applications. So this is valid for my user only. Installing it in /usr/share/applications make is usable system wide.
An easy way to generate the .desktop file is to run the program,in which case the icon should come up on the Unity task bar. Then you can fix it there right clicking the icon and selecting "lock to launcher".
--
 Uli Raich - 2017-03-25
 Before assembling anything you should solder the red and black wires to the 2 stepper motors driving the wheels. They are easier to solder before the motor is mounted. Then you mount the motor using the 2 semi-transparent plastic pieces and 2 long screws as shown in the photo:
 Here the wheel and the encoder wheel are already mounted on the motor. The encoder wheel needs additional sensors, not included in the kit, to be made functional. The back wheel is mounted with 4 distance pieces as shown:
 The most tricky part is the assembly of the ultra-sonic distance sensor onto the servo-motor. First you have to screw the small white cross into the round plastic socket. The cross is by far to big and needs to be cut in order to fit into the socket.

 Now the SDK runs but I get a library error:
linux64-start:
[exec] Picked up JAVA_TOOL_OPTIONS:
[exec] Invalid library found in /opt/ucc/micros/arduino/Arduino/build/linux/work/libraries/Firmata-2.5.4: /opt/ucc/micros/arduino/Arduino/build/linux/work/libraries/Firmata-2.5.4
The reason is that Firmata-2.5.4 is empty. I delete Firmata-2.5.4, rename Firmata to Firmata-2.5.4 and create a symbolic link Firmata → Firmata-2.5.4, which solves the problem.
Finally I execute install.sh to get the desktop file which I install in the Unity task panel. This is how the SDK looks like on the screen:
 Here are some pages on the robot software
--


