The Neo 6M GPS receiver
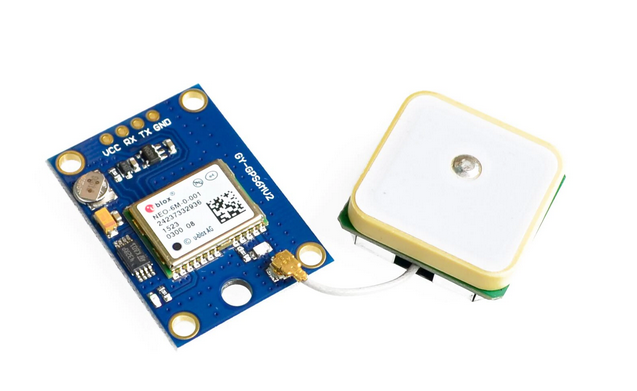
Most GPS receivers use a UART to communicate with their hosts and the Neo 6M is no exception. The ESP32 has 3 hardware UARTs with the following default connections:| UART number | default Rx,Tx GPIO pins |
| 0 | 3,1 |
| 1 | 9,10 |
| 2 | 16,17 |
| Pin on Neo 6M | Pin on ESP32 bus |
| Vcc | 3.3V |
| Rx | Rx: D1 = GPIO 22 |
| Tx | Tx: D2 = GPIO 21, only needed if you want to modify parameters on the Neo 6M |
| Gnd | Gnd |
Reading NMEA sentences with the ESP32
Once the connection is made and the UART instantiated all you need is an endless loop to read the UART line by line. This is what you will see if you print the result: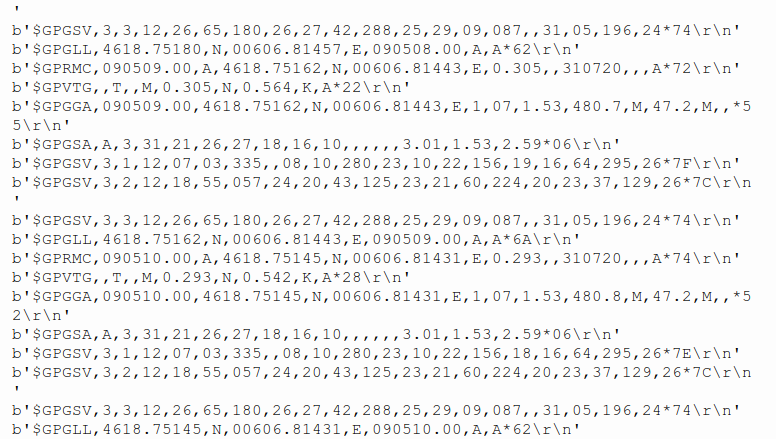 These are sentences of the NMEA protocol.
 Connecting the GPS receiver to your PC
In order to read out the GPS receiver from the PC we need a USB to serial converter: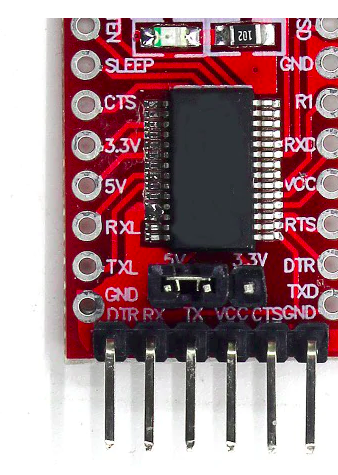 As can be seen on the photo the connections must be made as follows (pin 1 is the leftmost pin)
| Pin no on the USB to serial converter | Label | Connection on GPS receiver |
| 1 | DTR | nc |
| 2 | RX | Tx |
| 3 | TX | Rx |
| 4 | VCC | 3.3V |
| 5 | CTS | nc |
| 6 | GND | GND |
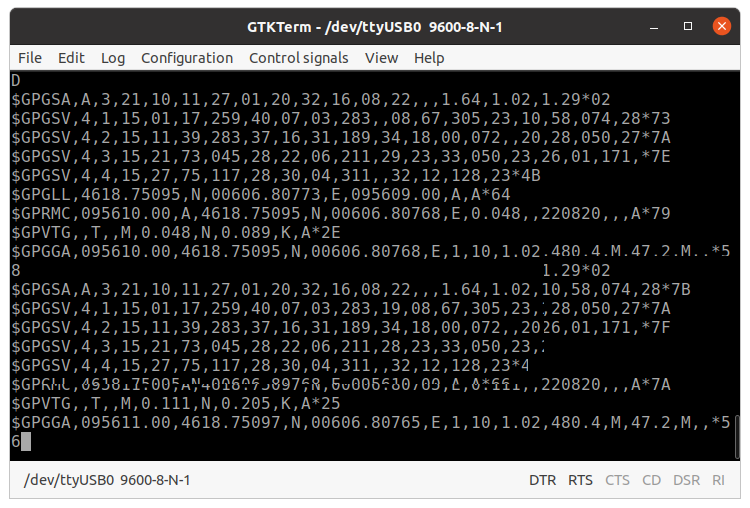
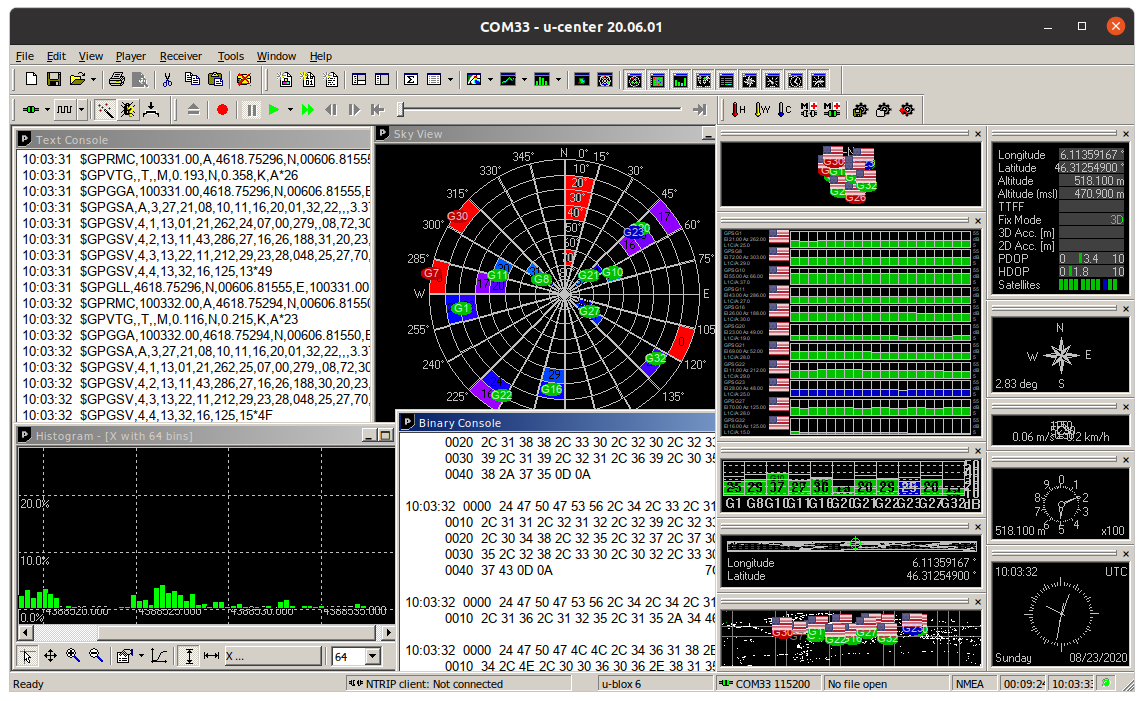
ublox u-center
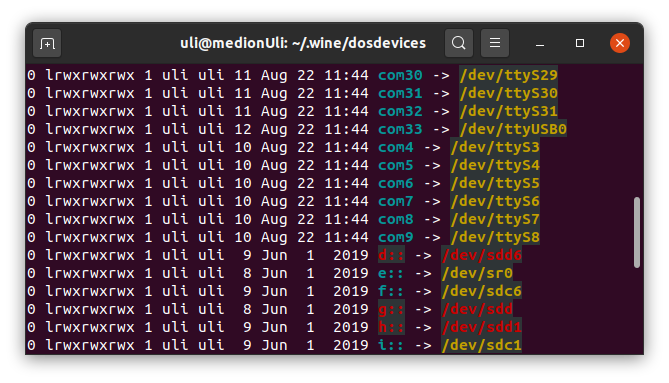
ublox provides a Windows application for its GPS receivers named u-center which you can download from https://www.u-blox.com/en/product/u-center~/.wine/drive_c/Program Files (x86)/u-blox/u-center_v20.06.01 Finally we must figure out to which Windows com port our USB to serial adapter corresponds to. Looking at ~/.wine/dosdevices shows that /dev/ttyUSB0 is mapped to com33.
 ublox GPS receivers use 2 different protocols
 - the NMEA protocol
- a proprietary binary protocol, which not only transmits GPS data but also allows to configure the receiver
gpsd
While u-center is a Windows application and can only be run on Linux through Windows emulation, there is also a GPS suite that runs natively on Linux named gpsd. The GPS daemon gpsd connects to a GPS receiver and provides its data to clients over a TCP connection.You can find it on https://gpsd.gitlab.io/gpsd/index.html. Check the gpsd documentation and in particular INSTALL.adoc and build.adoc in the source repository for information on how to build and install gpsd. Once installed we first make sure that the daemon is not already running:systemctl stop gpsd
systemctl stop gpsd.socket To check that the GPS receiver is sending data we can check with gpscat:
gpscat -s 115200 /dev/ttyUSB0
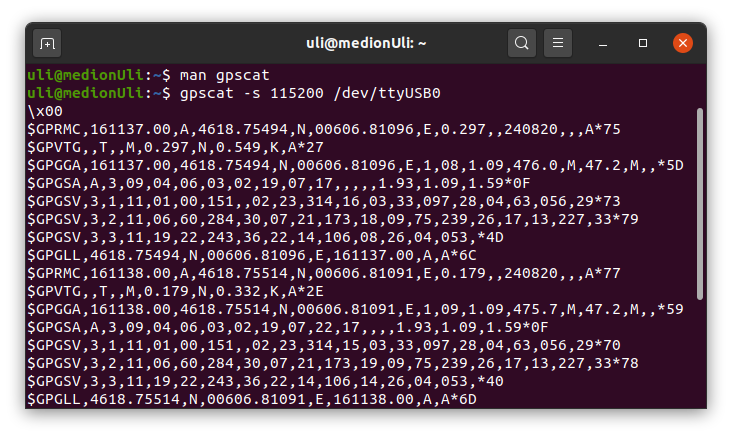 Then we can run gpsd as a foreground process (-N), specify the baud rate (-s 115200) and the serial port to which the neo 6M is connected (/dev/ttyUSB0):
 gpsd -N -s 115200 /dev/ttyUSB0 Once the daemon is running we use gpspipe to see the NMEA sentences on the console: gpspipe -r This time the NMEA sentences are not picked up from the USB to serial converted but from the TCP/IP port 2947 where gpsd provides information to its clients.
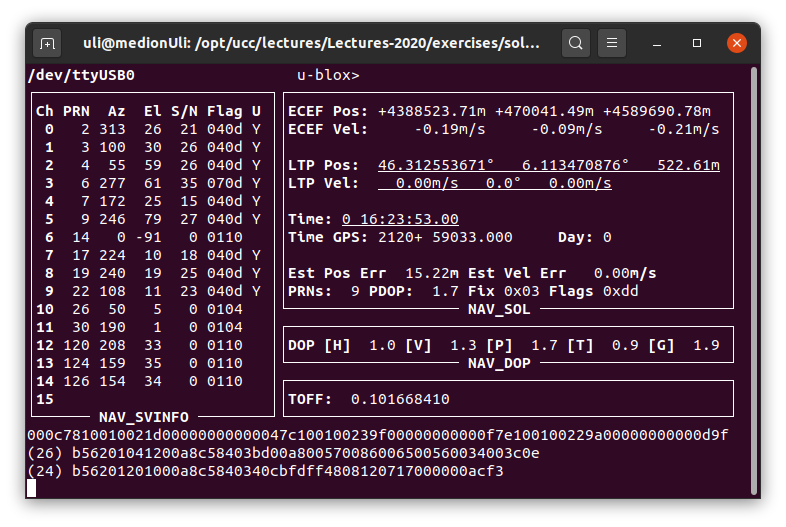
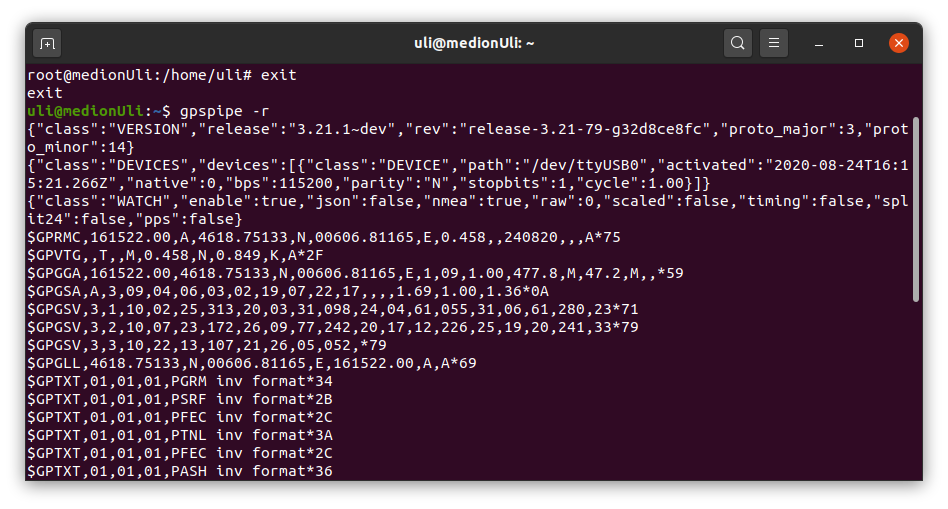 Now that we know that gpsd is working normally we can start gspmon which extracts basic GPS information like latitude, longitude, altitude and time and some information about the satellites seen.
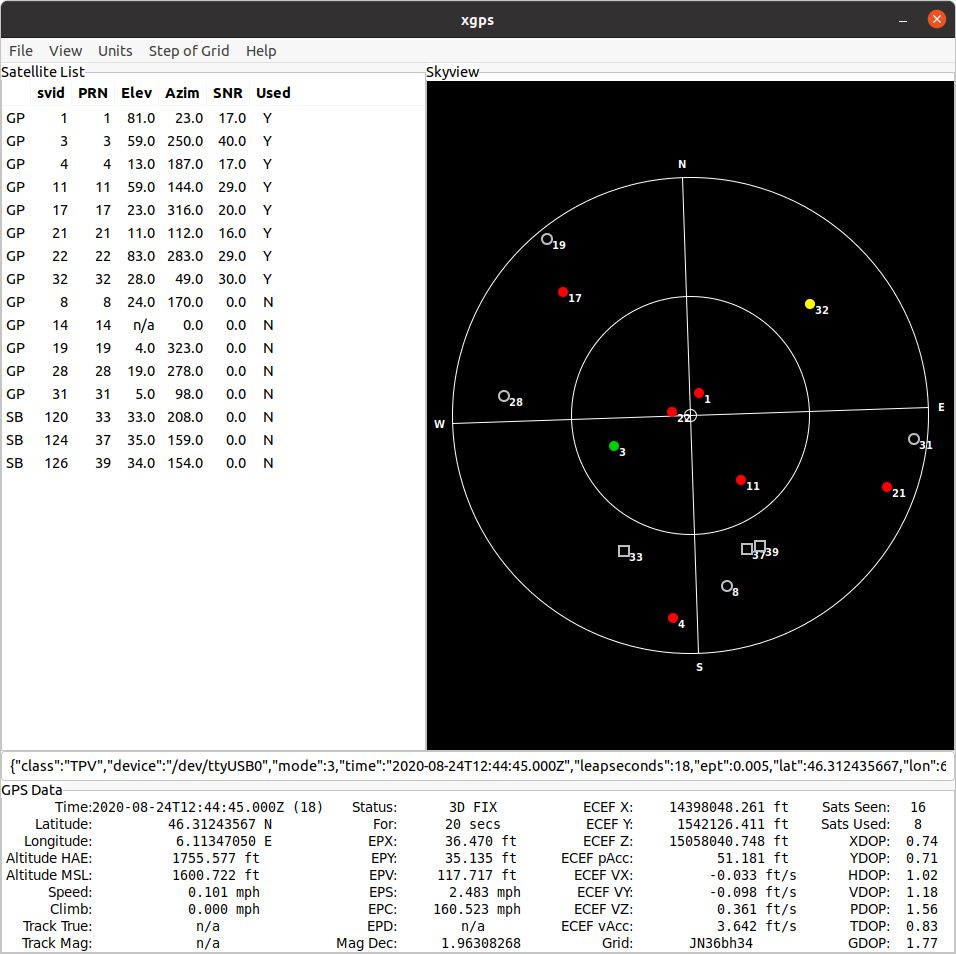
 Finally we run xgps to give us a graphical representation of the satellites in the sky.
 More programs are part of gpsd but I will let you discover those yourself.
Showing GPS position information on a map
There is a nice tutorial from the Linux journal describing how to use gpsd when taking GPS information from a mobile phone:- https://www.linux-magazine.com/Issues/2018/210/Tutorial-gpsd#article_f2

- https://www.linux-magazine.com/Issues/2018/210/Tutorial-gpsd/(offset)/3#article_i3

- Get the GPS data from the neo 6M connected through a USB to serial adapter to the PC and send the information to gpsd
- Run gpspipe or gpsmon to verify that the data are seen.
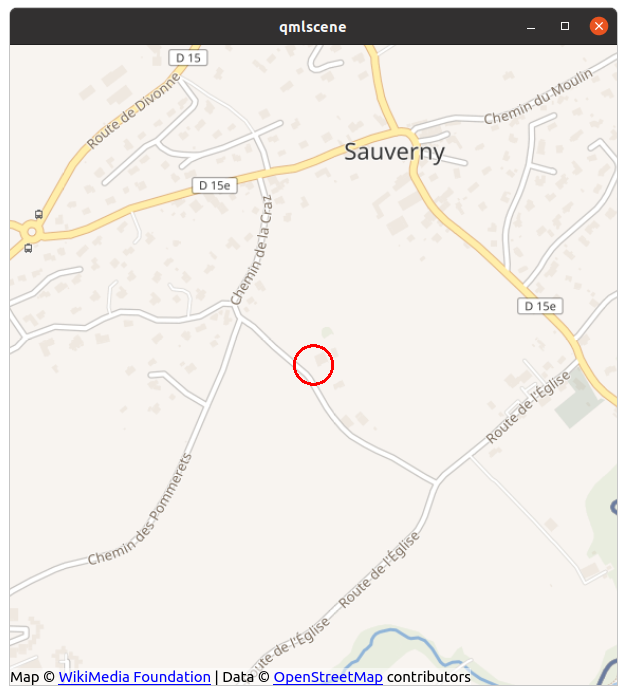
- Send the data to OpenStreetView and display them in marble
 . This is done with the map.qml file described in the second part of the tutorial
Getting NMEA information for gpsd from the ESP32
gpsd does not only allow reading GPS information from the serial line but it can also get this information from a TCP of UDP socket. It should therefore be possible to keep the ublox neo M6 connected to the ESP32 and write a simple TCP server (named ser2tcpServer.py. I use port 29998 for this server) which listens to a connection request from gpsd and then reads NMEA sentences from the ESP32 UART and transfers them to gpsd over the TCP socket. To get things to work we must:- start the ser2tcpServer.py (on the ESP32)
- start gpsd with tcp://IP_OF_ESP32:29998
Finally you pipe the messages from gpsd back into a socket with gpspipe -r | nc -l 29999 from where they are picked up by map.qml. The result will be the same map as shown above but the GPS source has been shifted from the PC serial port to the ESP32. --
Comments
| I | Attachment | History | Action | Size | Date | Who | Comment |
|---|---|---|---|---|---|---|---|
| |
dosdevices.png | r1 | manage | 91.0 K | 2020-08-23 - 10:17 | UliRaich | |
| |
gps.png | r1 | manage | 169.9 K | 2020-07-01 - 09:03 | UliRaich | |
| |
gpscat.png | r1 | manage | 91.2 K | 2020-08-24 - 18:40 | UliRaich | |
| |
gpsdata.png | r1 | manage | 89.8 K | 2020-07-31 - 13:04 | UliRaich | |
| |
gpsmap.png | r1 | manage | 182.2 K | 2020-08-24 - 18:39 | UliRaich | |
| |
gpsmon.png | r1 | manage | 92.8 K | 2020-08-24 - 18:39 | UliRaich | |
| |
gpspipe.png | r1 | manage | 106.9 K | 2020-08-24 - 18:45 | UliRaich | |
| |
nmeaPC.png | r1 | manage | 107.5 K | 2020-08-23 - 10:17 | UliRaich | |
| |
u-center.png | r1 | manage | 186.0 K | 2020-08-23 - 10:17 | UliRaich | |
| |
usb2serial.png | r1 | manage | 268.7 K | 2020-08-23 - 10:17 | UliRaich | |
| |
xgps.png | r1 | manage | 140.0 K | 2020-08-24 - 18:45 | UliRaich |
Ideas, requests, problems regarding TWiki? Send feedback


