The ESP32-CAM module
Introduction
The ESP32-CAM module is dedicated to camera readout. It provides- an ESP32-S CPU
- a 2 mega pixel OV2640 camera
 and its interface.
- a very bright LED used as a flashlight connected to GPIO 4
- a user LED connected to GPIO 33
- an SD cardholder for SD card with up to 4GBytes capacity
The pinout
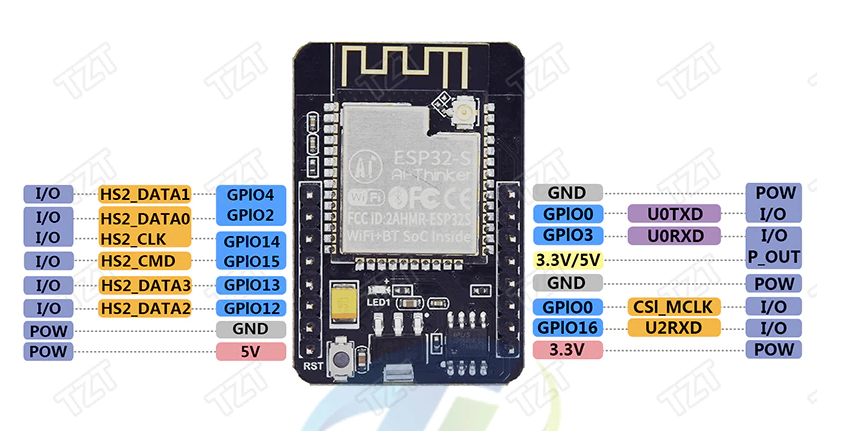 You find a detailed description of the pinout at https://randomnerdtutorials.com/esp32-cam-ai-thinker-pinout
| GPIO | SD-card interface |
|---|---|
| SCK | GPIO 14 |
| MISO | GPIO 2 |
| MOSI | GPIO 15 |
| CS (SS) | GPIO 13 |
Board Variants
The ESP32-CAM comes in a number of variants.The original ESP32-CAM
The original version has no USB connector and can only be controlled with a USB to serial adapter.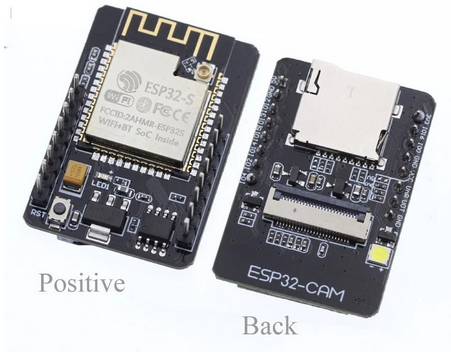 The connections to the USB to serial adapter are as follows:
| ESP32-CAM | USB to serial |
|---|---|
| 5V | 5V |
| GND | GND |
| UOR | Tx |
| UOT | Rx |
The ESP32-CAM-MB
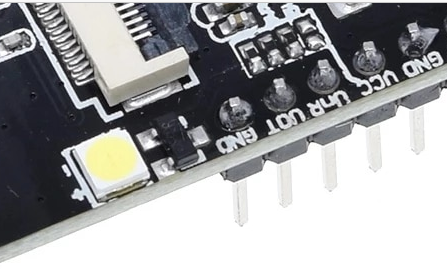
The second variant comes with the ESP32-CAM-MB main board, which provides a micro USB connector.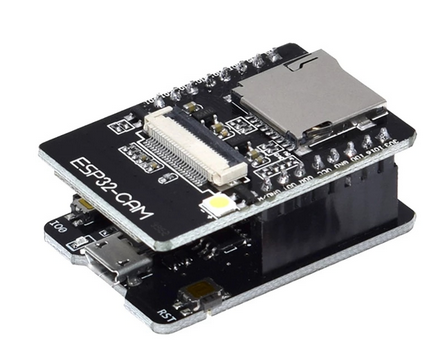 The ESB32-CAM board, to be used with this main board, is slightly modified with respect to the original one:
 |
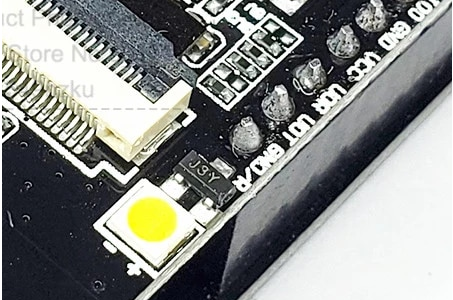 |
| The original ESP32-CAM | The ESP32-CAM modified to work with the main board |
export RSHELL_DTR="false"
When trying to run thonny you will hit the same problem. The new version of thonny (I use version 4.0.0-dev) however allows you to disable DTR and RTS in the file
$HOME/.config/Thonny/configuration.ini. Just add the 2 lines setting DTR and RTS to False at the end of the file.

The esp32-cam model with the micro USB connector installed
This model works similarly to the original version, but with the micro USB connector and a "flash button" already installed. A simple micro USB cable is needed for communication. In order to set the module to flash mode, hold the flash button while pushing the RST button.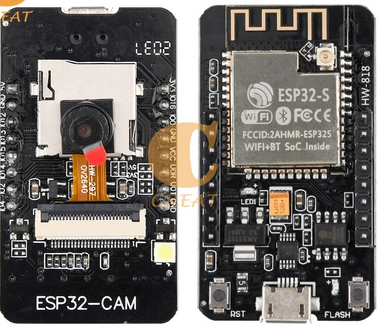
Testing with esp32-who
The github repository esp32-whoidf.py menuconfigIn the Kconfig menu coming up you must
- specify your WiFi setup (SSID and password)
- select the camera type (AI Thinker)
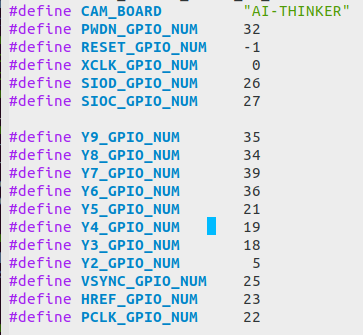 With these settings, we can build the application and flash it to the board.
idf.py build
idf.py flash
After successful flashing connect minicom (or rshell in the case of the esp32-cam-mb) to the camera module and reset the machine.
Integration into MicroPython
Espressif provides an esp32-cameraesp-idf-v4.3.1-cam/components. In order to make sure that the correct esp-idf is used for compilation I set:
export ESPIDF=/opt/ucc/micros/esp32/esp32-v4.3.1-cam
export IDF_PATH=/opt/ucc/micros/esp32/esp32-v4.3.1-cam
Reserving some space in SPIRAM for the image buffer
Standard MicroPython uses all the SPIRAM for its heap. This results in an error when the esp32 camera driver tries to allocate space in SPIRAM for its image buffer. I therefore modified the MicroPython sources to keep some free space for the camera driver. Here is the part I modified in main.c. As you can see, 256 kBytes are reserved.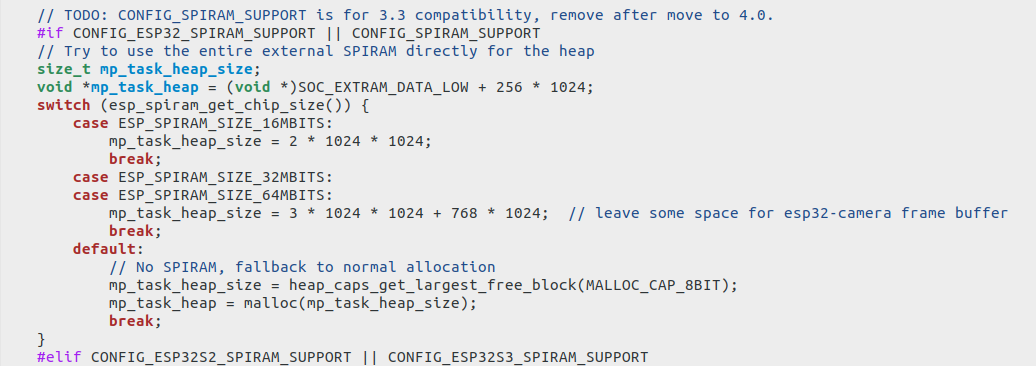 After this modification, you may follow the description in https://lemariva.com/blog/2020/06/micropython-support-cameras-m5camera-esp32-cam-etc
 Comments
| I | Attachment | History | Action | Size | Date | Who | Comment |
|---|---|---|---|---|---|---|---|
| |
esp32-cam-gnd-r.png | r1 | manage | 257.5 K | 2021-10-21 - 08:54 | UliRaich | |
| |
esp32-cam-gnd.png | r1 | manage | 147.0 K | 2021-10-21 - 08:54 | UliRaich | |
| |
esp32-cam-mb.png | r1 | manage | 163.0 K | 2021-10-21 - 09:03 | UliRaich | |
| |
esp32-cam-standard.png | r1 | manage | 227.4 K | 2021-10-21 - 08:54 | UliRaich | |
| |
esp32-cam-usb | r1 | manage | 124.6 K | 2021-10-21 - 08:54 | UliRaich | |
| |
esp32-cam-usb.png | r1 | manage | 246.4 K | 2021-10-21 - 08:54 | UliRaich | |
| |
esp32-cam.png | r1 | manage | 358.6 K | 2021-10-21 - 08:54 | UliRaich | |
| |
esp32-cam_imgbuf.png | r1 | manage | 76.4 K | 2022-01-11 - 10:13 | UliRaich | |
| |
esp32-who.png | r1 | manage | 25.3 K | 2021-10-21 - 09:09 | UliRaich | |
| |
esp32cam_GPIO.png | r1 | manage | 25.3 K | 2022-01-11 - 10:04 | UliRaich | |
| |
setupForCamera.png | r1 | manage | 22.4 K | 2021-10-21 - 09:57 | UliRaich | |
| |
thonny_mods.png | r1 | manage | 13.2 K | 2021-10-21 - 08:54 | UliRaich |
Ideas, requests, problems regarding TWiki? Send feedback


